Making persistent changes on a read-only Raspberry Pi

Introduction
The ability to boot a Raspberry Pi from a read-only file system can be advantageous for a variety of reasons and I've previously written a number of posts that look at use cases and implementation approaches.
A key challenge is then making changes, often this requires a reboot to change from read-only to read-write, then the changes are made, then the read-only setting is reintroduced with another reboot - this can get tedious when developing a solution.
Preparation
Set up the pi for read-only with OverlayFS using my Mini Guide: Read only Raspberry Pi (without NFS) - at the time of writing this still works with RasberryPI OS, formerly Raspbian.
Basic Changes
Unlike the built-in Raspberry Pi process to enable OverlayFS the steps above keeps the read only file system visible as a mount:
pi@raspberrypi:~ $ df -h
Filesystem      Size  Used Avail Use% Mounted on
devtmpfs        1.8G     0  1.8G   0% /dev
tmpfs           383M   88K  383M   1% /mnt/run
/dev/mmcblk0p2   29G  1.2G   26G   5% /ro
root-rw         1.9G  101M  1.8G   6% /rw
overlayfs-root  1.9G  101M  1.8G   6% /
tmpfs           1.9G     0  1.9G   0% /dev/shm
tmpfs           1.9G  8.5M  1.9G   1% /run
tmpfs           5.0M  4.0K  5.0M   1% /run/lock
tmpfs           1.9G     0  1.9G   0% /sys/fs/cgroup
/dev/mmcblk0p1  253M   63M  190M  25% /boot
tmpfs           383M     0  383M   0% /run/user/1000
/ro is the root partition, and it is currently mounted as read-only:
pi@raspberrypi:~ $ mount -v | grep /ro
/dev/mmcblk0p2 on /ro type ext4 (ro,relatime)
As ro suggests, we can't make any changes to it:
pi@raspberrypi:~ $ touch /ro/home/pi/test.txt
touch: cannot touch '/ro/home/pi/test.txt': Read-only file system
To make basic changes we can simply remount that in read/write mode:
sudo mount -o remount,rw /ro
The command above should succeed silently, which can be verified with:
pi@raspberrypi:~ $ mount -v | grep /ro
/dev/mmcblk0p2 on /ro type ext4 (rw,relatime)
Where it was previously read-only (ro) it's now read/write (rw) and we can make a test file:
touch /ro/home/pi/test.txt
We can also see immediately that the file is available:
pi@raspberrypi:~ $ ls /home/pi/
test.txt
OverlayFS is presenting a writable layer over the read-only file system, so any underlying changes are visible immediately (unless there's also a modification in the temporary read/write layer).
Now the file system can be remounted in read-only mode:
sudo mount -o remount,ro /ro
A quick reboot will also get it back to read-only mode.
Advanced Changes
There are other changes that anticipate the root file system and the associated directory structure being available at the / mount point (rather than /ro).
One such example would be installing software packages using apt.
For most actions that expect root to be at / we can use chroot which can run commands or provide an interactive shell using a given folder as /.
pi@raspberrypi:~ $ sudo chroot /ro
root@raspberrypi:/#
From here we can run apt update or apt install amongst other things. A "chrooted" environment has access the the majority of the host features including the network and the Internet.
We can then return to the parent file system by exiting the shell and then return to the original state by remounting in read-only mode.
Some changes do not get picked up so easily and a logout or reboot may be required which will also ensure we are back in read-only mode.
A helper script
When developing a software stack or configuration for deployment it may be necessary to make lots of little tweaks in response to testing so wrapping the whole process in a script can make life a lot easier, especially if the script lives on the SD card as is always available.
Set the file system to read/write mode and create a using your editor of choice: sudo vi /ro/usr/bin/rwshell, then paste the following script:
#!/bin/bash
set -e
sudo mount -o remount,rw /ro
sudo chroot /ro
sudo mount -o remount,ro /ro
And be sure to make it executable: sudo chmod +x /ro/usr/bin/rwshell.
Sometimes a change in the chrooted read/write root might hold a file open, in the example below it appears a service is started and the remount to read-only fails:
pi@raspberrypi:~ $ mount -v | grep /ro
/dev/mmcblk0p2 on /ro type ext4 (ro,relatime)
pi@raspberrypi:~ $ rwshell
root@raspberrypi:/# apt install sysstat
Reading package lists... Done
Building dependency tree
Reading state information... Done
The following additional packages will be installed:
  libsensors-config libsensors5
Suggested packages:
  lm-sensors isag
The following NEW packages will be installed:
  libsensors-config libsensors5 sysstat
0 upgraded, 3 newly installed, 0 to remove and 0 not upgraded.
Need to get 594 kB of archives.
After this operation, 1,662 kB of additional disk space will be used.
Do you want to continue? [Y/n]
--- snip ---
Creating config file /etc/default/sysstat with new version
update-alternatives: using /usr/bin/sar.sysstat to provide /usr/bin/sar (sar) in auto mode
Created symlink /etc/systemd/system/multi-user.target.wants/sysstat.service → /lib/systemd/system/sysstat.service.
--- snip ---
root@raspberrypi:/# exit
mount: /ro: mount point is busy.
pi@raspberrypi:~ $ which sysstat
pi@raspberrypi:~ $ mount -v | grep /ro
/dev/mmcblk0p2 on /ro type ext4 (rw,relatime)
For robustness the script could be updated to reboot instead of remount or detect the error and conditionally reboot.
Quick & Easy Read only (a side note)
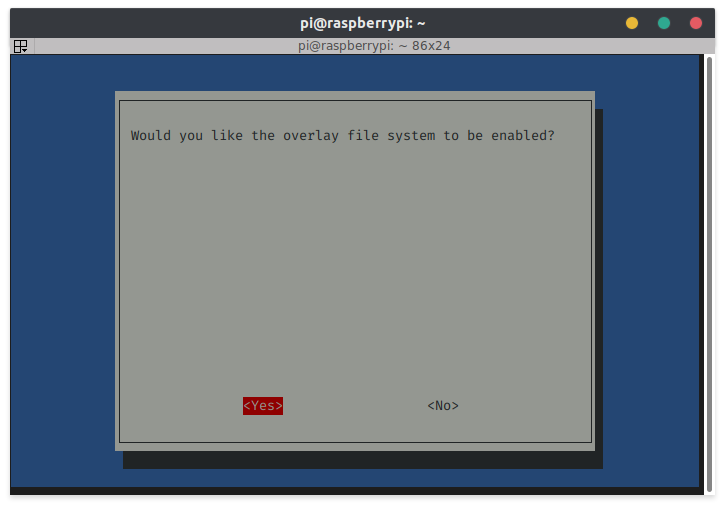
The raspi-config tool can now enable OverlayFS.
It is less useful for this article as the underlying read-only root file system is not exposed which means it is not possible (or at least easy) to remount it in read/write mode.
pi@raspberrypi:~ $ df -h
Filesystem      Size  Used Avail Use% Mounted on
udev            1.8G     0  1.8G   0% /dev
tmpfs           383M  5.3M  378M   2% /run
overlay         1.9G  101M  1.8G   6% /
tmpfs           1.9G     0  1.9G   0% /dev/shm
tmpfs           5.0M  4.0K  5.0M   1% /run/lock
tmpfs           1.9G     0  1.9G   0% /sys/fs/cgroup
/dev/mmcblk0p1  253M   63M  190M  25% /boot
tmpfs           383M     0  383M   0% /run/user/1000
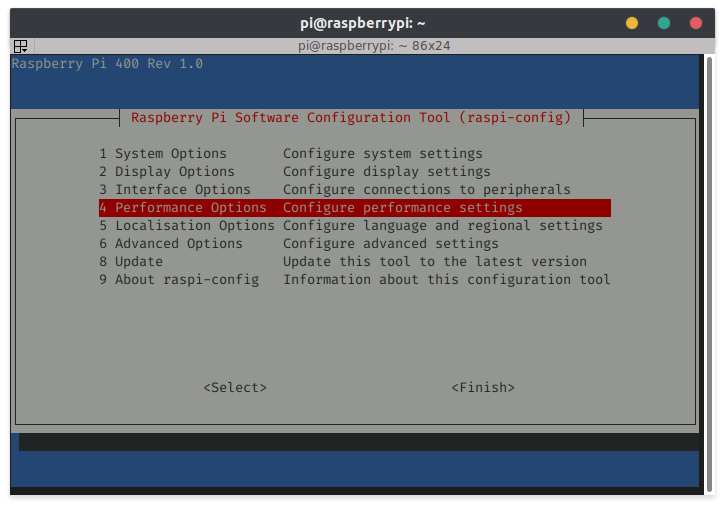
To enable it open raspi-config, go to Performance Options, then select Overlay File System. It also provides options to protect the boot volume.
Note: In older versions of raspi-config the Overlay File System option is under Advanced Options.