The Wallbox Unlock-box

The Wallbox Electric Vehicle charger does exactly what is says on the tin. It charges the car, follows schedules and rules, and is easy to install. That said, the software and app is a bit lacking at times.
Originally this project started as an integration with the BMW Connected Drive API and the Wallbox API to automatically unlock the charger when the car was at home, but access issues on the BMW side required a change of approach.
This post looks at the challenges along with one of my solutions for easily and consistently unlocking the Wallbox, using a simple push button to unlock the charger using the Wallbox API (I or the API client may be blocked..!).
Motivation
The Backstory
I've had a hybrid car (a BMW 330e) since March 2022, which I have enjoyed more than expected and am now a promoter of electric vehicles rather than a detractor, but that's another story.
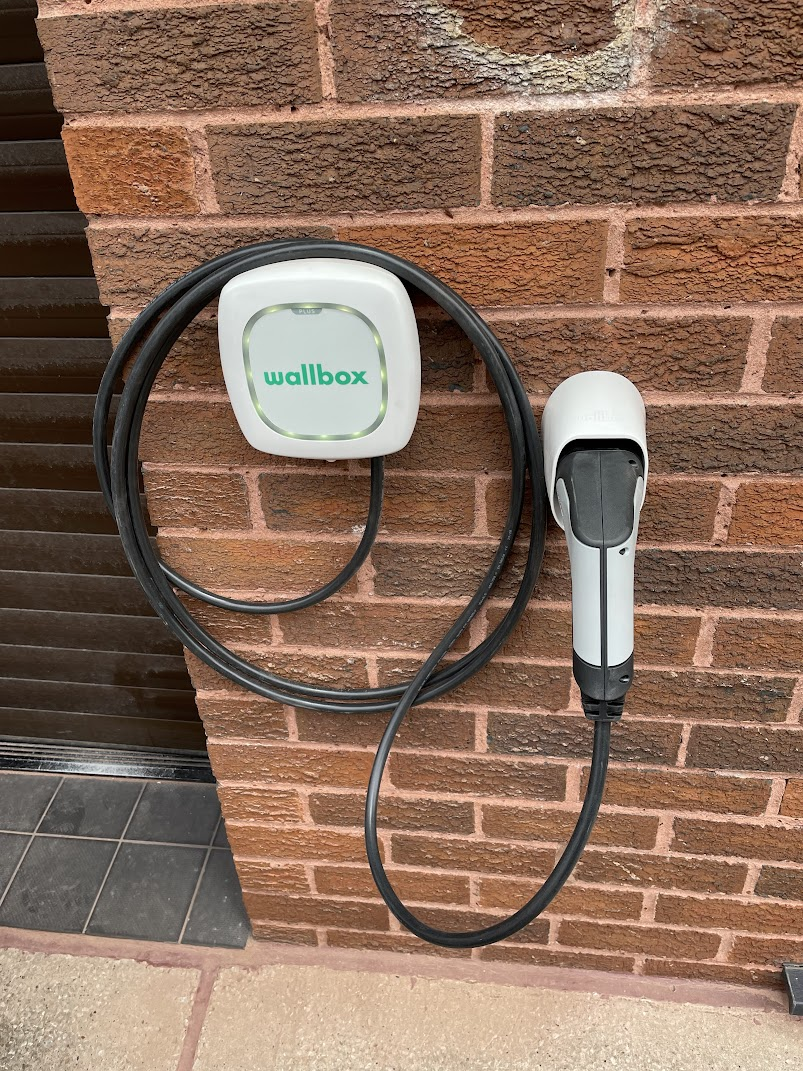
A few weeks after taking delivery of the car I managed to switch to Octopus Energy, despite the crazy energy market situation, and subsequently installed a Wallbox Pulsar Plus charger. While there are numerous options this was a cost-effective tethered (plug attached) charger with built in earthing protection - negating the need for an Earth Rod, and it has various smart features.
Generally speaking I like the Wallbox, it allows for charging to be managed in a number of ways including peak current (great with balancing solar generation) and time schedules, along with web and app-based control.
It also has an 'auto lock' feature which is designed to ensure only those who should have access can charge their vehicles. It does this by 'locking' the charger after x minutes (in my case 1 minute). The lock function itself kicks in after the car is unplugged once the duration expires. The usual sequence of events is to arrive home, plug the car in, unlock the charger. The charger then waits until the 4 hour window overnight to charge the car, and when I leave again in the morning the charger locks the moment the car is disconnected as that is the first disconnect event after 1-minute from the unlock event.
In theory that's perfect as it prevents any random person from charging their car, unlikely as that might sound (though I have heard stories...).
The problem is that unlocking the charger, or moreover remembering to and then following through becomes a weak point, and if the charger isn't unlocked, the car doesn't charge.
The 330e has "up to" ~30 miles electric range, in hilly Sheffield that's more like 20 max - so missing a charge on a work night has a knock on impact on fuel consumption.
The Unlocking Problem
By default the app first tries to connect over Bluetooth, so it's a bit sluggish at the best of times, but when at home depending on the distance to the Wallbox this may or not succeed meaning it takes a while after opening the app, to then be able to interact with the device, including unlocking it.
What usually happens is I start the process when I get home, open the app, put the phone down (as it takes a while), the phone screen locks and the whole process gets forgotten - at least for a bit, possibly for the rest of the day.
The Alexa skill is more clunky and despite some promotion of the Watch App, it's similarly clunky and sluggish (as of writing, it actually crashes).
While it does sound like a first world problem, and to be fair it largely is, as a hybrid the car has a limited electric range, which for me ends up being around 20 miles. As a result if more than a handful or charging cycles are missed it's back to paying for petrol!
What I'm looking for is a quick and easy way to unlock it in a way that's not too open.
It's worth noting that I have since linked the Wallbox to Home Assistant on a HAS-T4 and Apple's Homekit via various integrations and that provides quick access from the pull-down menu.
The Wallbox API
The Wallbox portal (my.wallbox.com) is a (Vue) Single Page Application (SPA).
In simple terms, this means that appears to be a conventional web page, the site can encapsulate logic locally though JavaScript that is evaluated in the browser, but any broader and/or external interactions must occur through an API of sorts. The API can then provide an interface to back-end or external systems like databases, etc.
A browser inspector allows anyone to see the API (Fetch/XHR) requests:
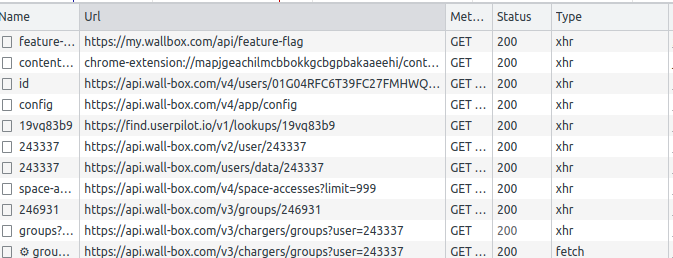
From these we can reverse engineer the API contract.
I was also able to extract a few useful values and other bits from the hosted un-obfuscated source, first the colour hex colours used for status in the portal (nice for parity):
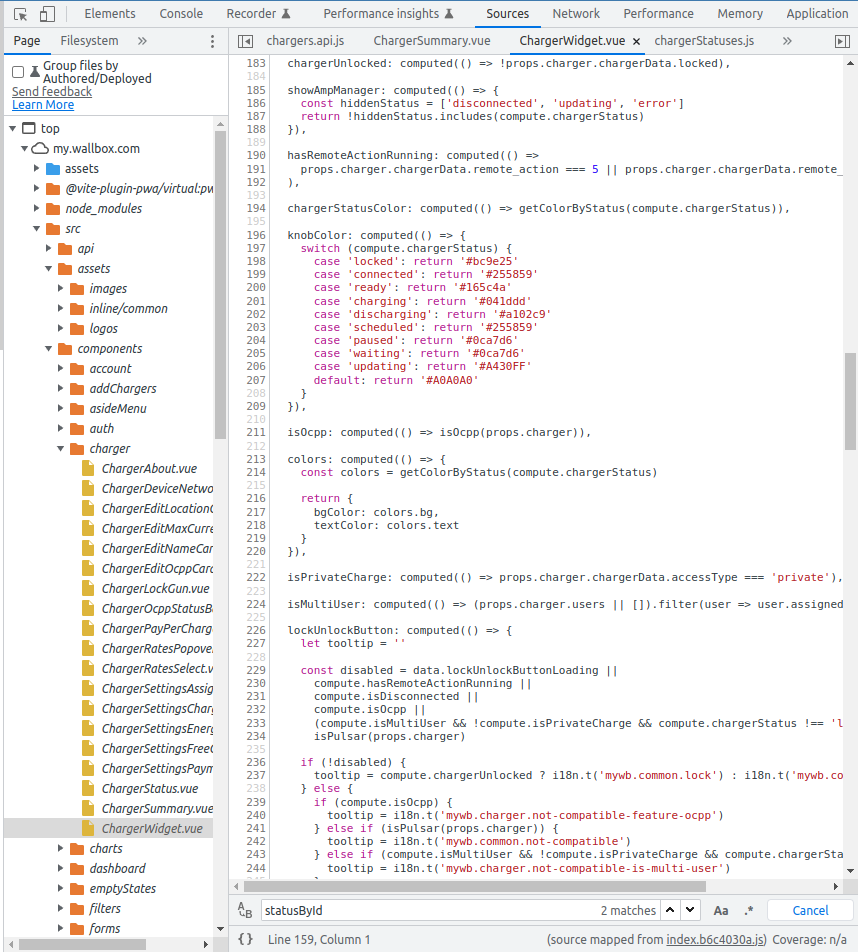
And the actual statuses and corresponding IDs:
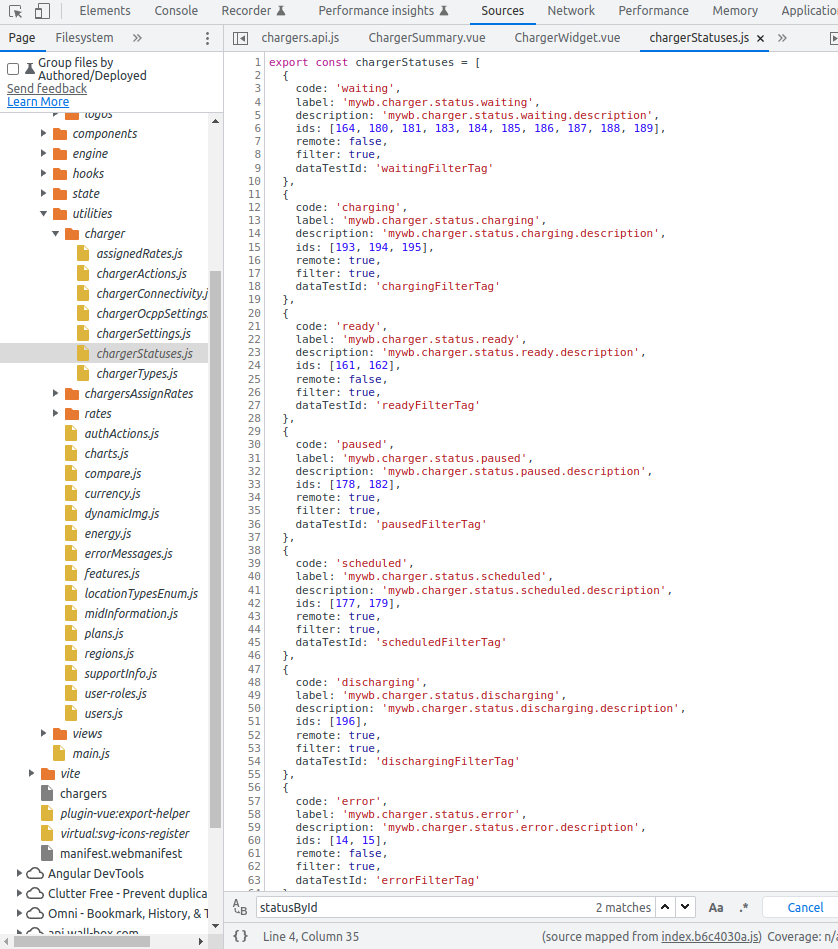
These are useful later on...
The API client implementation is as follows in Typescript with axios. It's not perfect but it does the job, and the sample code below highlights the simplicity of using the API - it is a fairly straightforward restful approach:
The token handling and login is fragile but it provides the basis to build upon. All the calls were derived from the web app calls via the browser's inspector.
Approach
Much of my home automation projects take on a split responsibility model.
The embedded/micro-controller hardware only communicates via WiFi & MQTT, and a home server mediates between the queue topic and any external APIs and/or other complex logic.
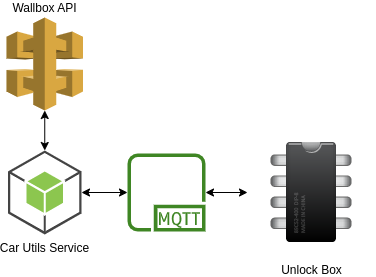
This ensures that the power and memory constrained micro-controllers do minimal heavy lifting, especially given the low-level C/C++ coding.
It also ensures service authentication is managed at a higher level, be it environment files or secrets, and means that external or domain changes can be tolerated in most cases without reflashing the chips.
The service that runs on the home server talks to the wallbox API and broadcasts the current lock status on the MQTT topic.
async function updateWallboxStatus() {
  const charger = await wallbox.getDefaultCharger();

  const status = await wallbox.status(charger.id);
  if (oldStatus !== status) {
    oldStatus = status;
    const code = statusById(status.chargerData.status).code;
    console.log("New Wallbox Status:", code);
    // console.log("New Wallbox Status:", status);
    client.publish('wallbox', `\$${code}`);

  }
}
The micro controller listens for status changes, predominantly to update the status LED:
void callback(char *topic, byte *payload, unsigned int length)
{
  byte *p = (byte *)malloc(length + 1);
  // Copy the payload to the new buffer
  memset(p, 0, length + 1);
  memcpy(p, payload, length);

  String pay((char *)p);

  // Ignore log messages
  if (pay.startsWith("$")) {
    log("Update arrived! on " + String(topic) + " / " + pay);
    if (pay.equals("$locked"))
    {
      state = LOCKED;
    }
    else if (pay.equals("$connected"))
    {
      state = CONNECTED;
    }
    else if (pay.equals("$ready"))
    {
      state = READY;
    }
    else if (pay.equals("$charging"))
    {
      state = CHARGING;
    }
    else if (pay.equals("$discharging"))
    {
      state = DISCHARGING;
    }
    else if (pay.equals("$scheduled"))
    {
      state = SCHEDULED;
    }
    else if (pay.equals("$paused"))
    {
      state = PAUSED;
    }
    else if (pay.equals("$waiting"))
    {
      state = WAITING;
    }
    else if (pay.equals("$updating"))
    {
      state = UPDATING;
    }
    else
    {
      state = UNKNOWN;
    }
  }

  // Free the memory
  free(p);
}
It also listens to to the topic for lock and unlock requests that originate from the unlock box.
client.on('message', async function (topic, message) {
    const msg = message.toString();
    console.log("MQTT Message:", topic, msg);
    if (topic !== 'wallbox') {
      console.warn("Unknown topic:", topic);
      return;
    }

    if (msg === 'lock') {
      console.log("Locking...");
      if (await lock()) {
        console.log("Locked!");
      } else {
        console.log("Failed to lock!");
      }
      safeUpdateWallbox();
    } else if (msg === 'unlock') {
      console.log("Unlocking...");
      if (await unlock()) {
        console.log("Unlocked!");
      } else {
        console.error("Unlock failed!");
      }
      safeUpdateWallbox();
    } else if (msg === 'connected') {
      safeUpdateWallbox();
    } else {
      console.warn("Unknown message:", msg);
    }

  });
}
The main loop on the micro controller manages connectivity and watches for button presses, triggering message publishes as required (note the lock button is looking for != 0 whereas unlock is == 0 due to the button differences noted below in the Hardware section):
void loop()
{
  ArduinoOTA.handle();

  if (!checkWifi())
  {
    return;
  }

  if (!client.connected())
  {
    reconnect();
  }
  client.loop();

  wifiGoodAt = millis();

  if (state != UNLOCKING && state != LOCKING)
  {
    bool unlock = digitalRead(0) == 0;
    if (unlock)
    {
      unlockPress();
      return;
    }

    bool lock = digitalRead(3) != 0;
    if (lock)
    {
      lockPress();
      return;
    }
  }

  idle();

  delay(10);
}
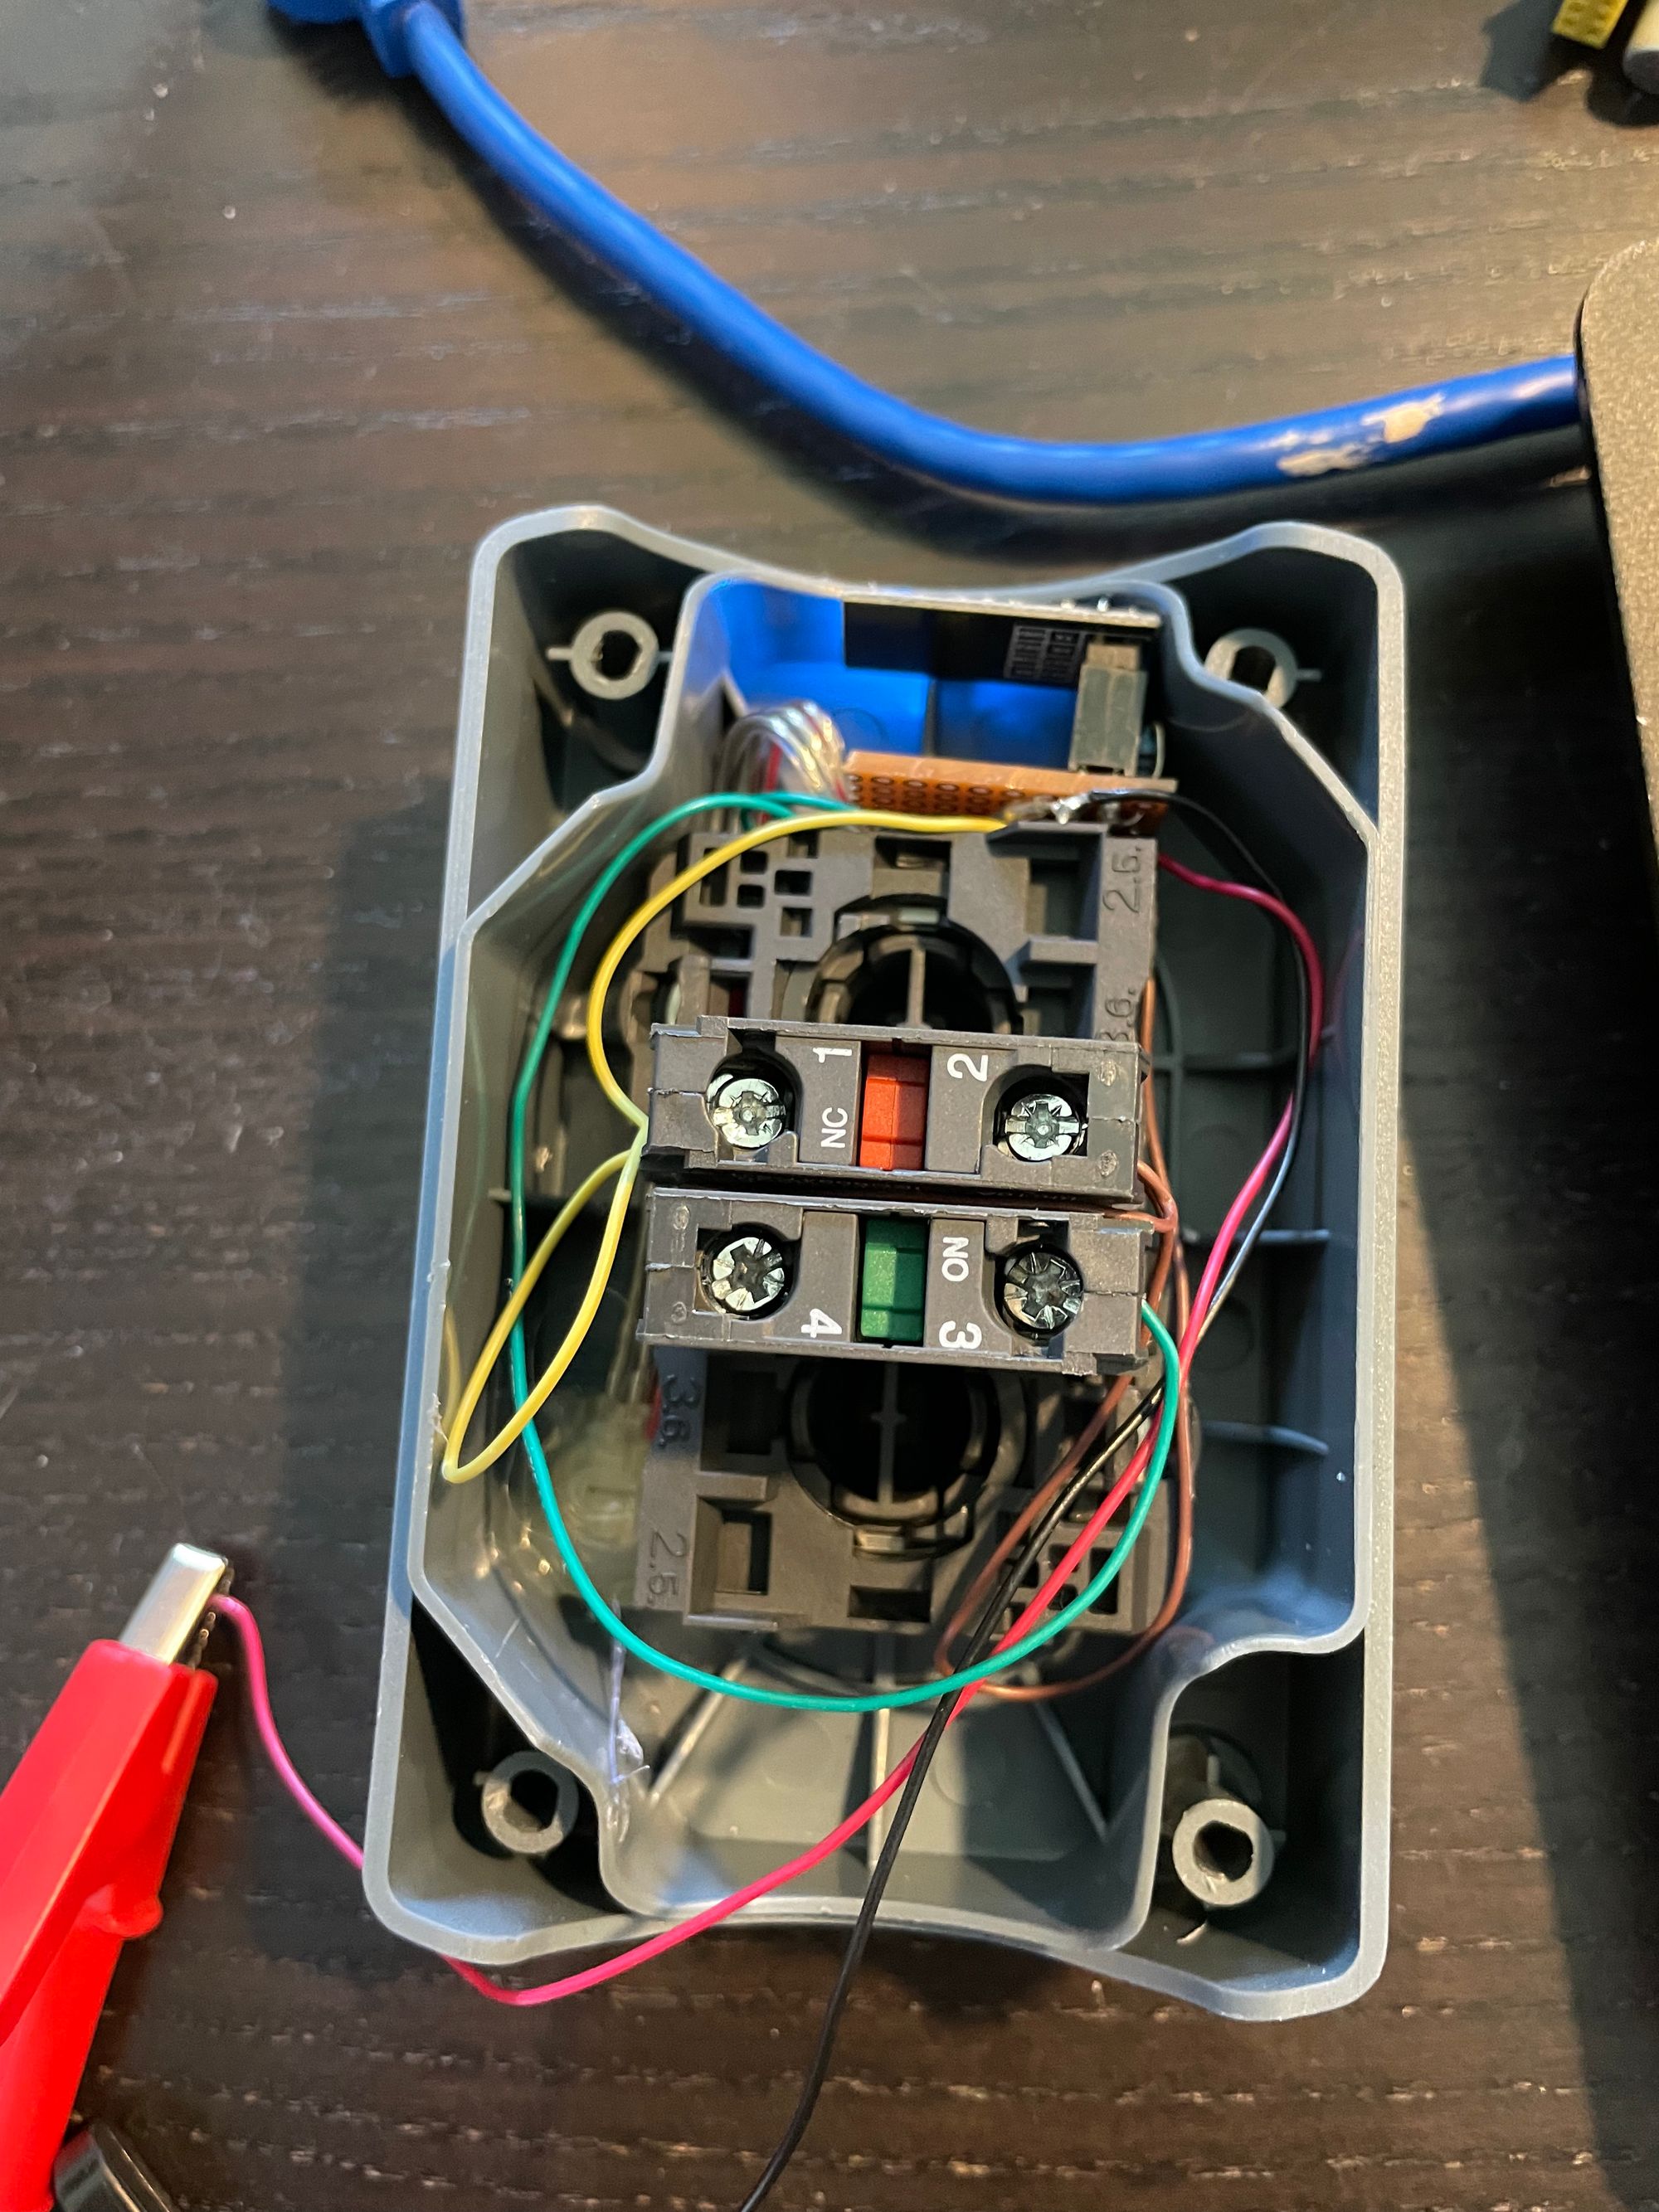
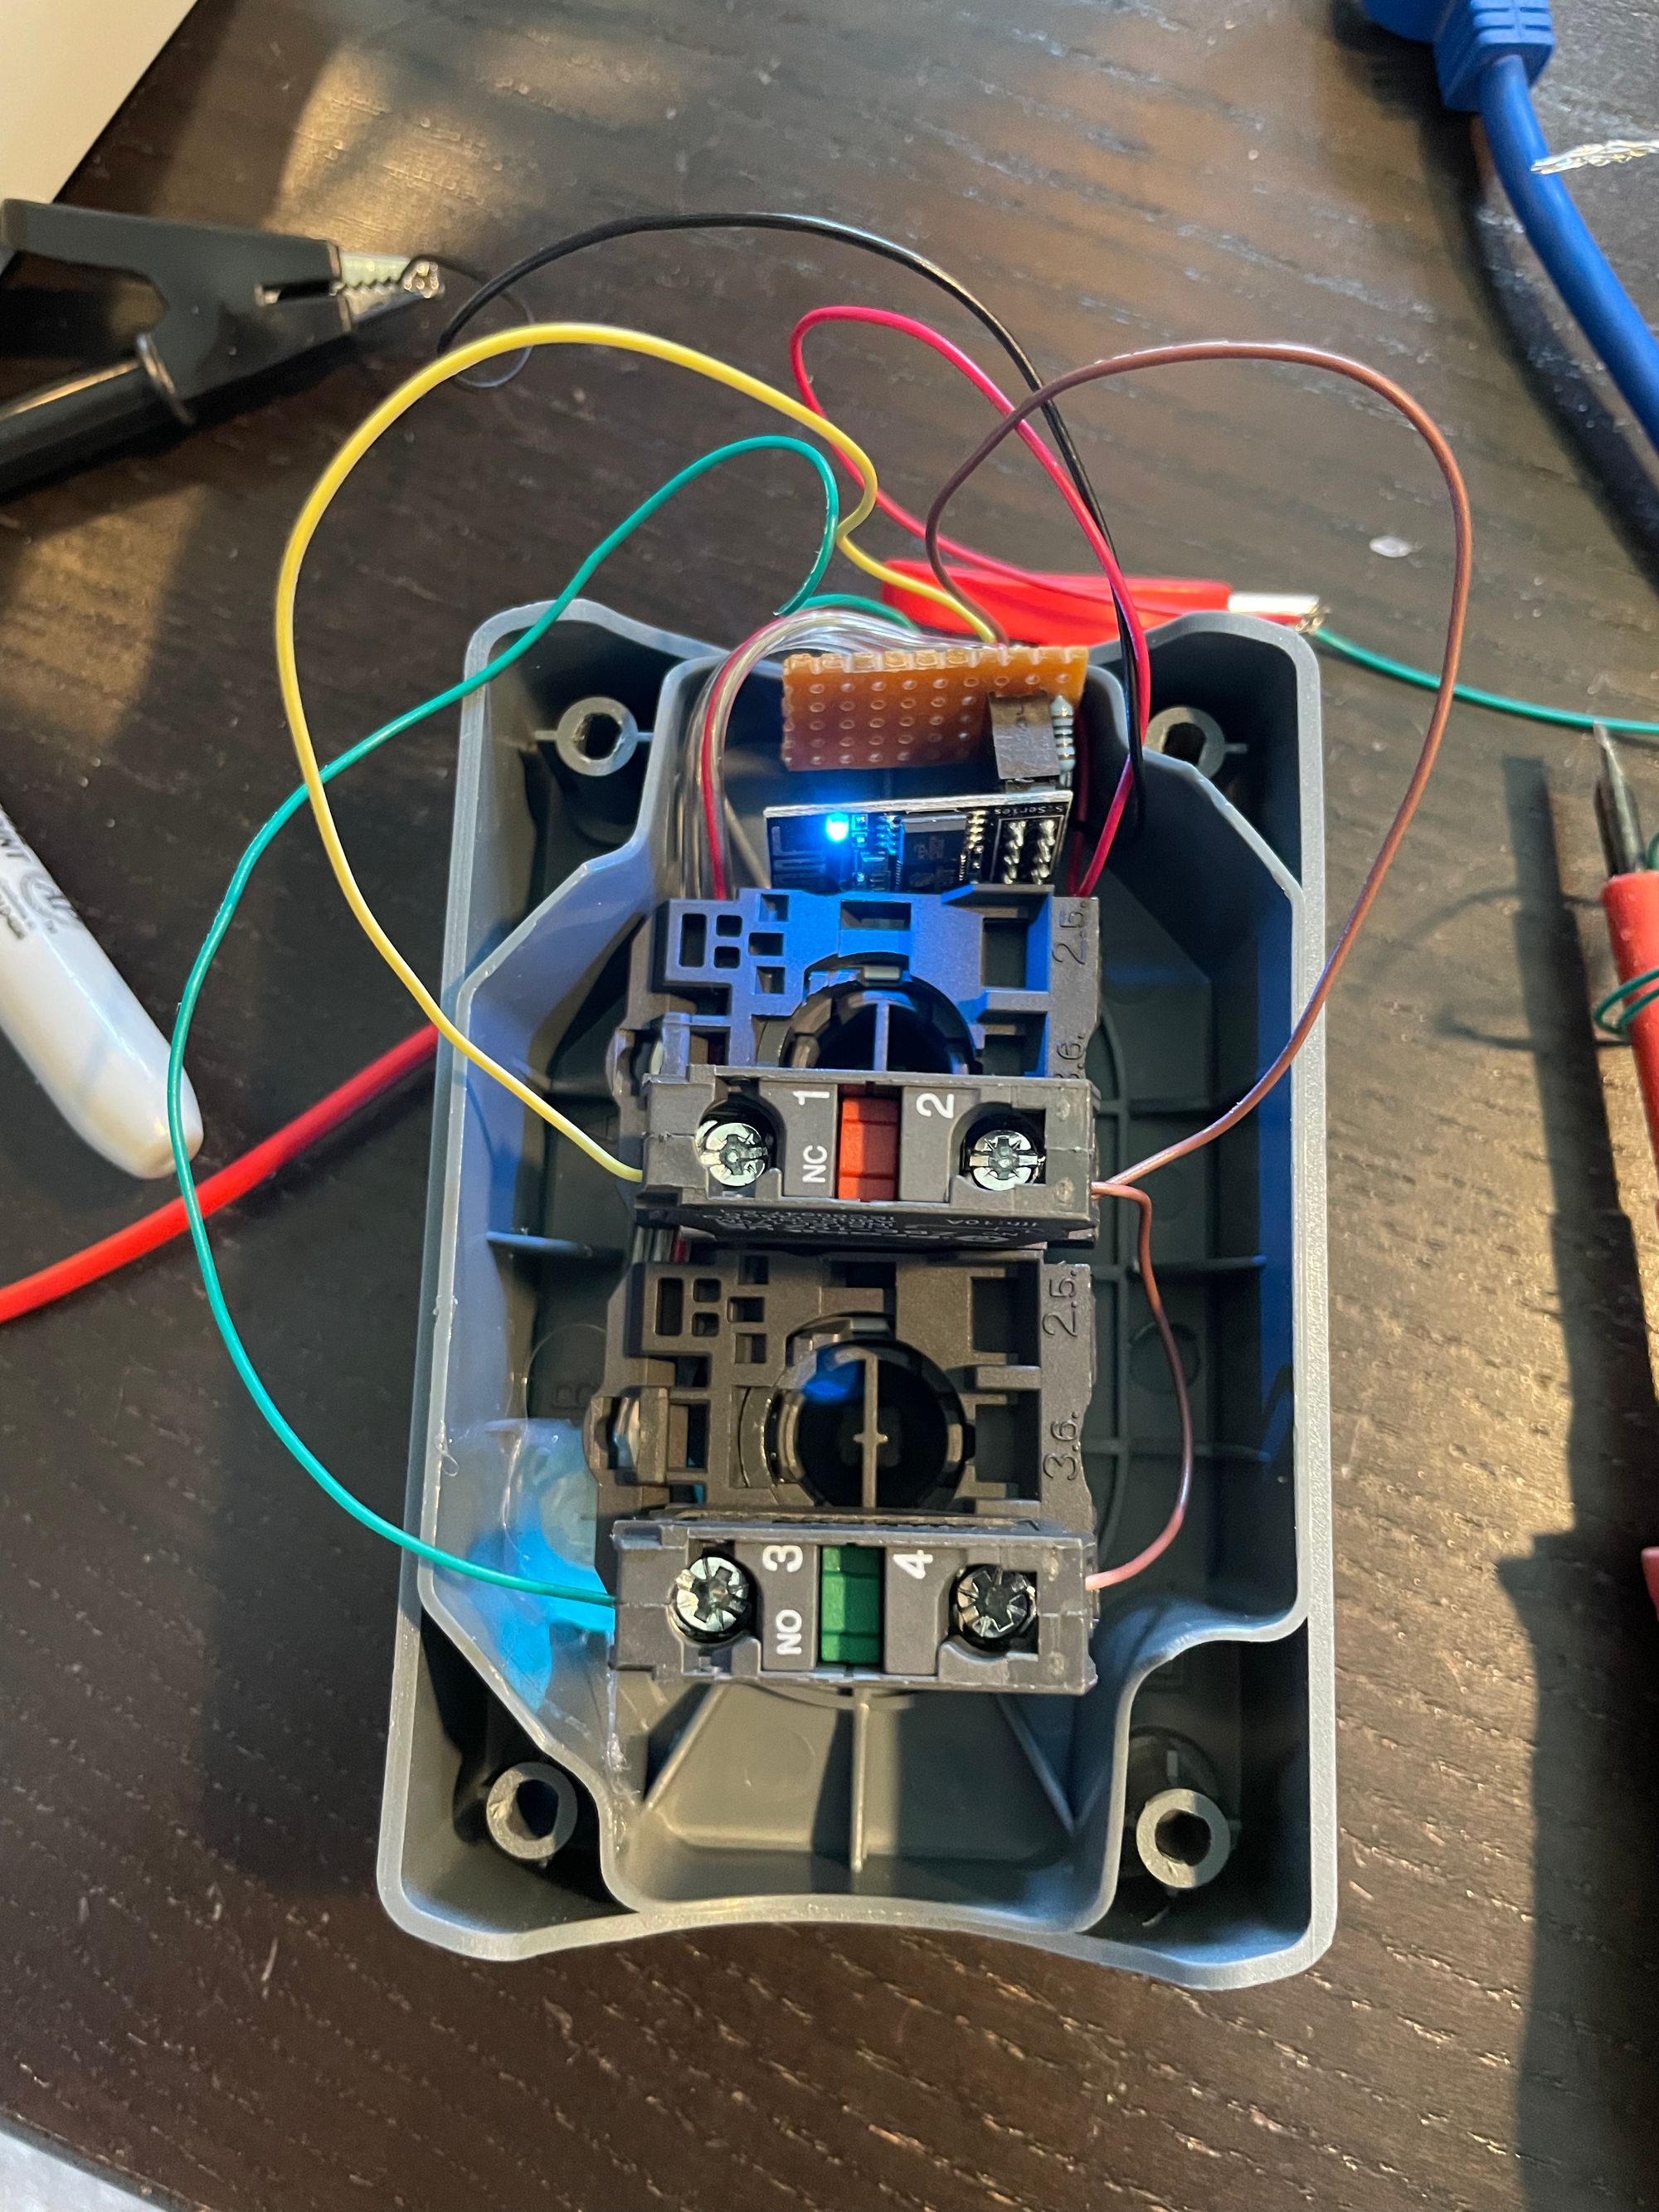
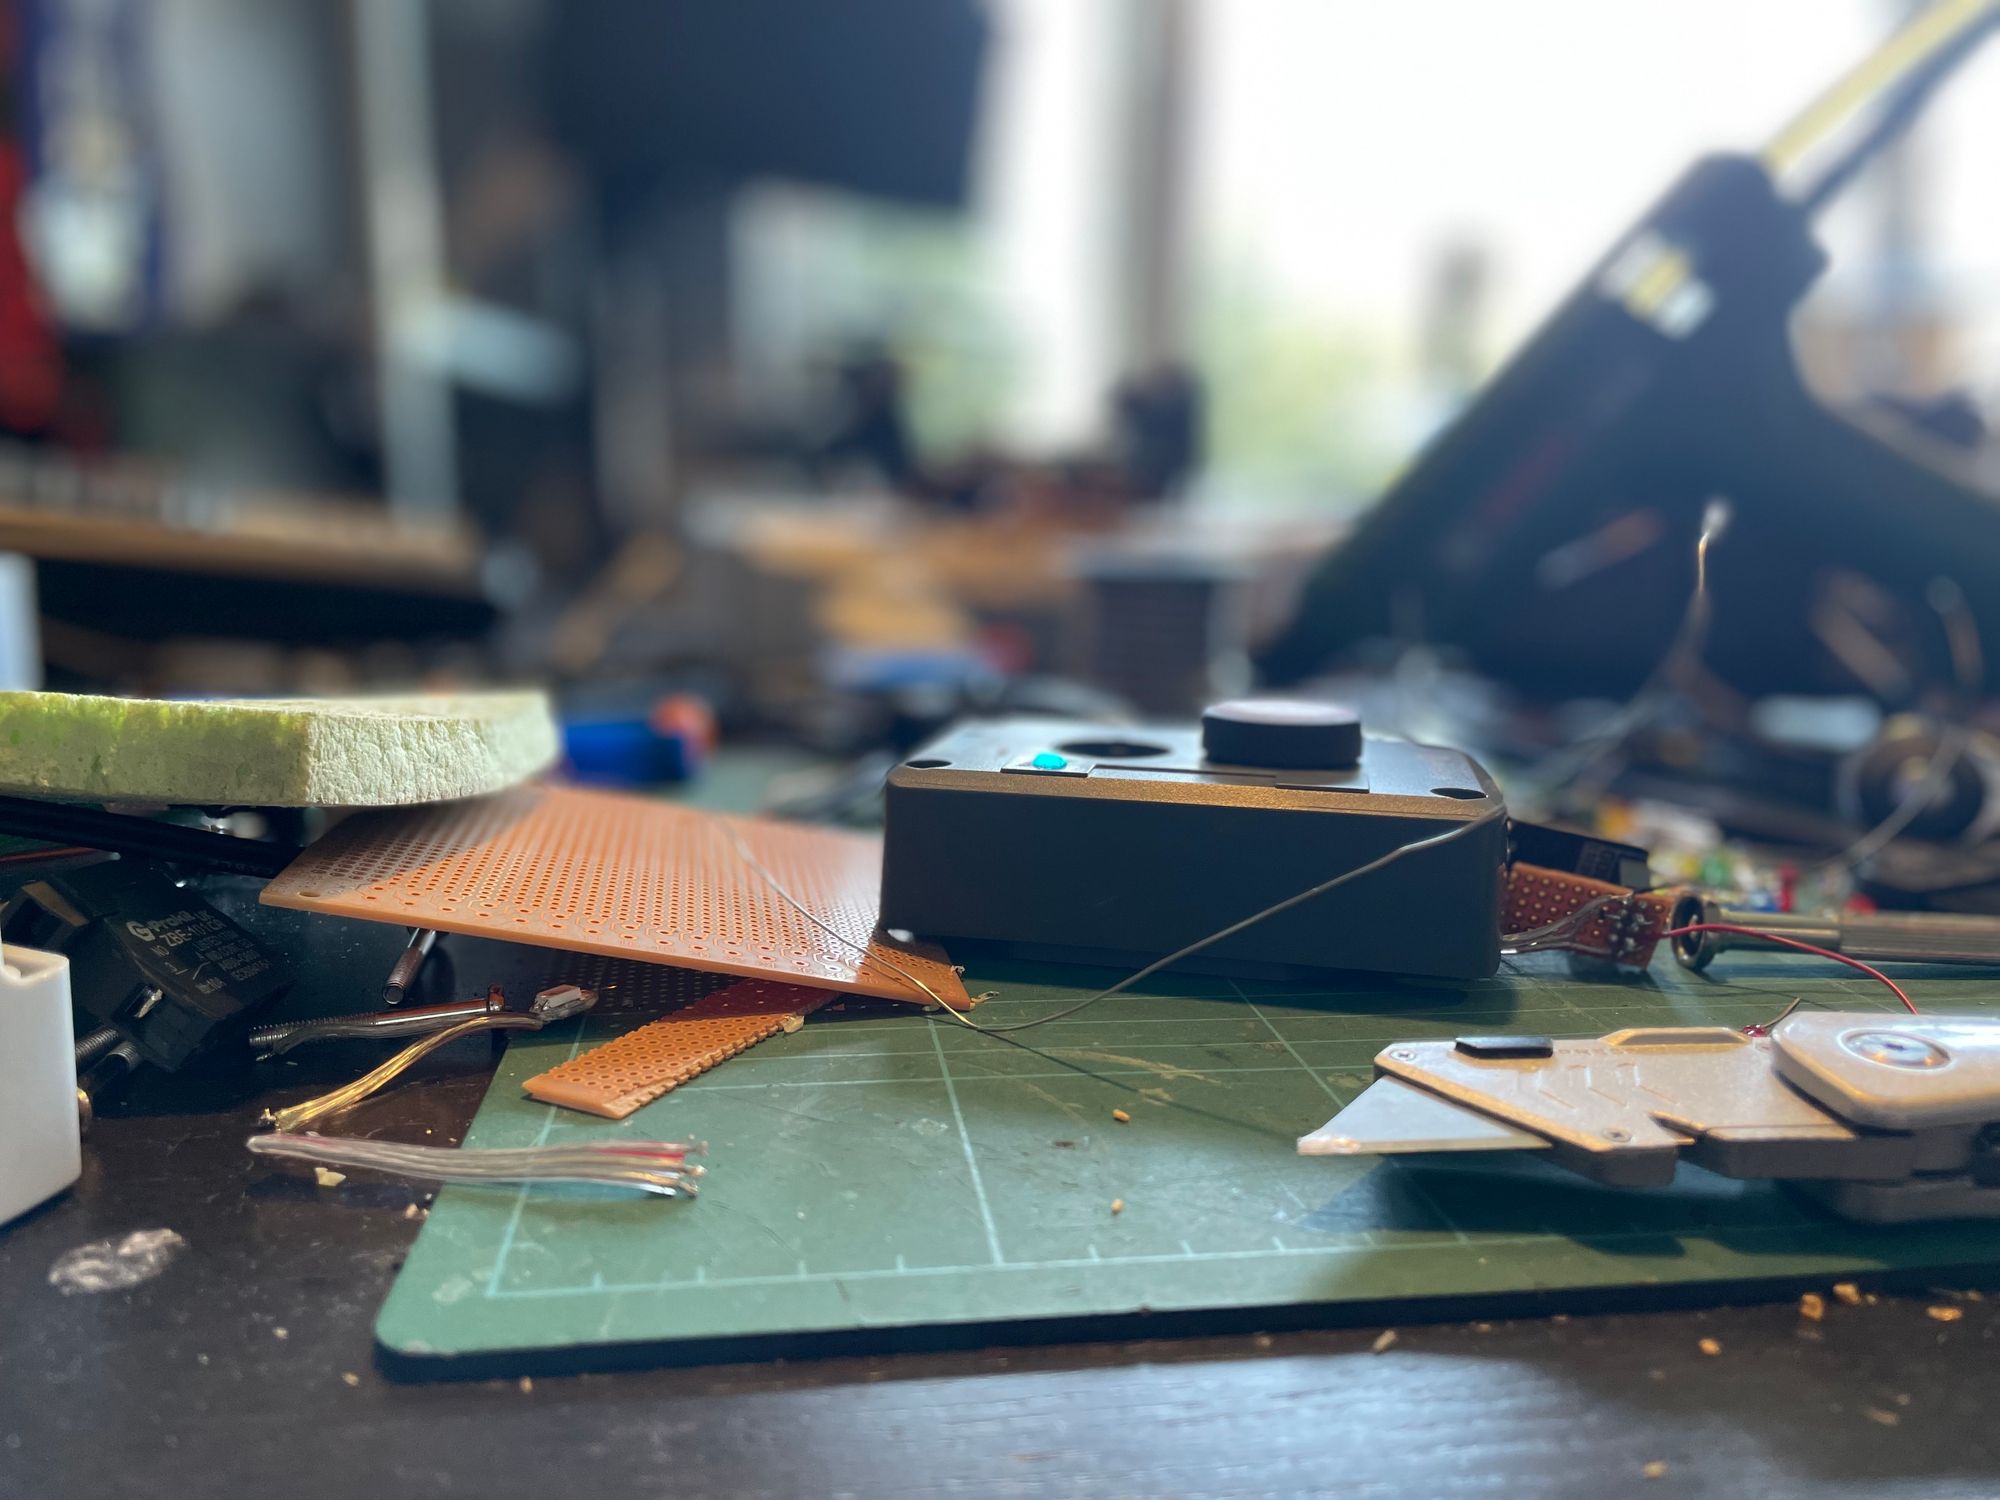
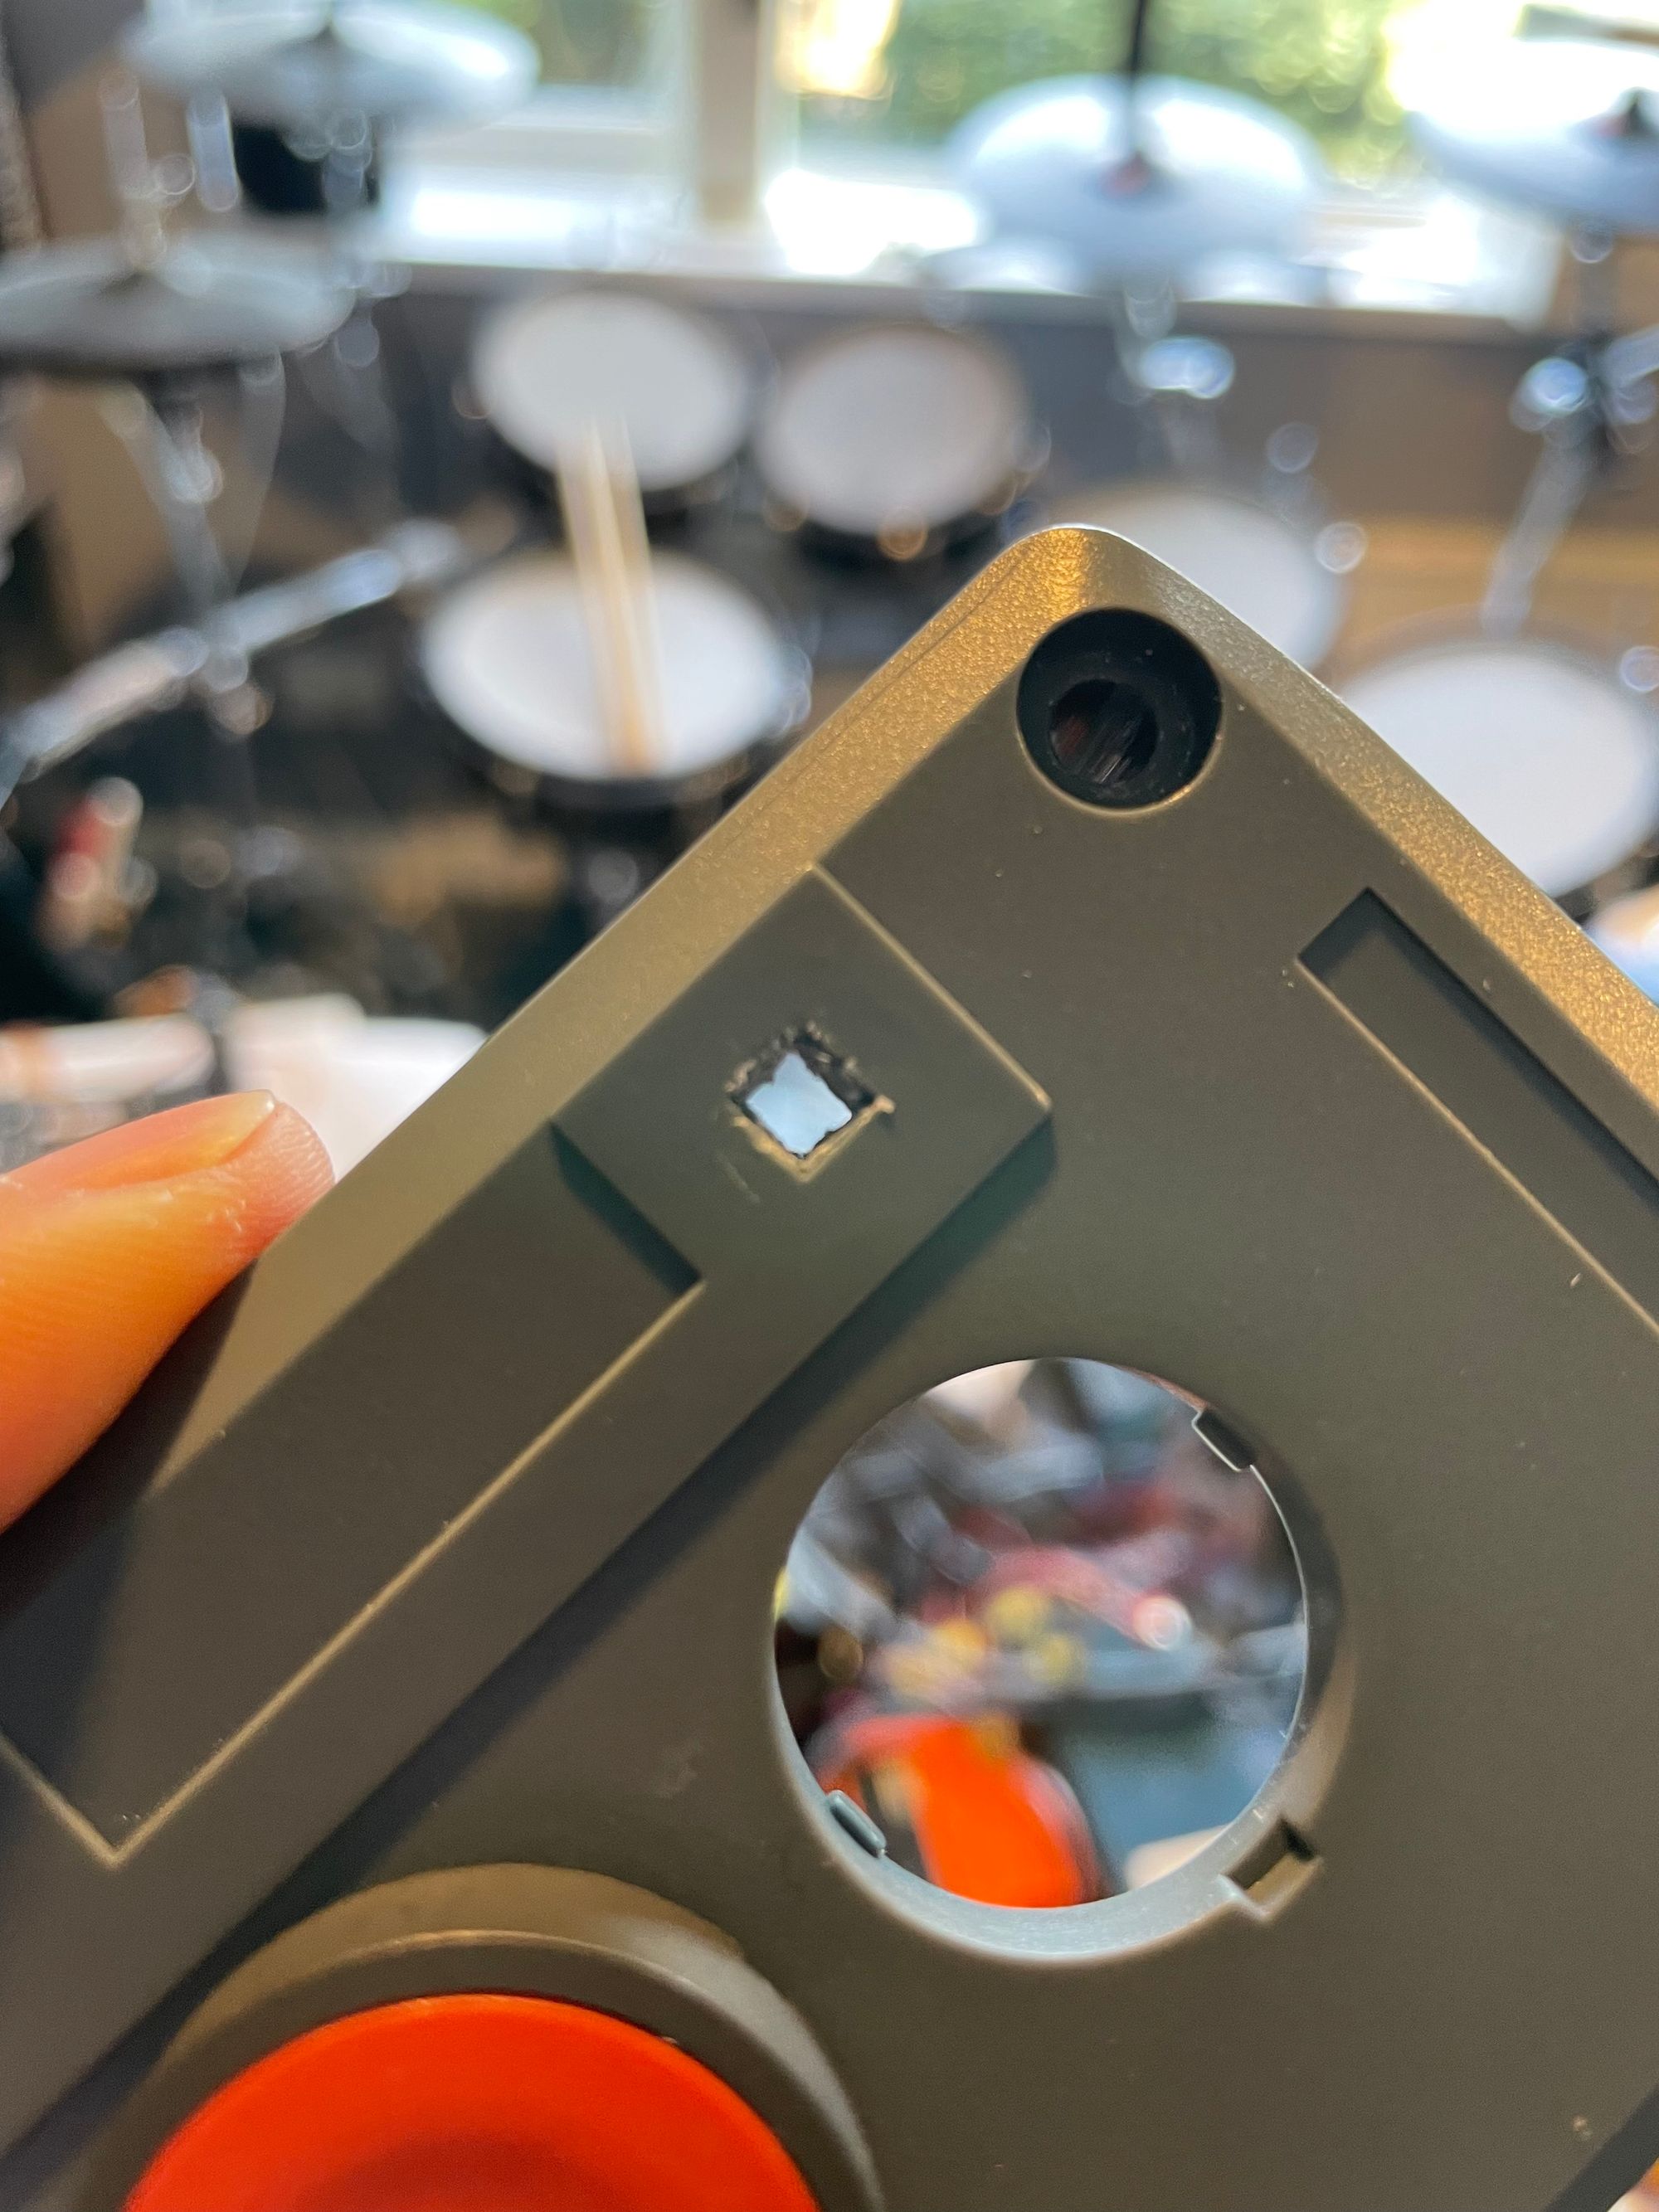
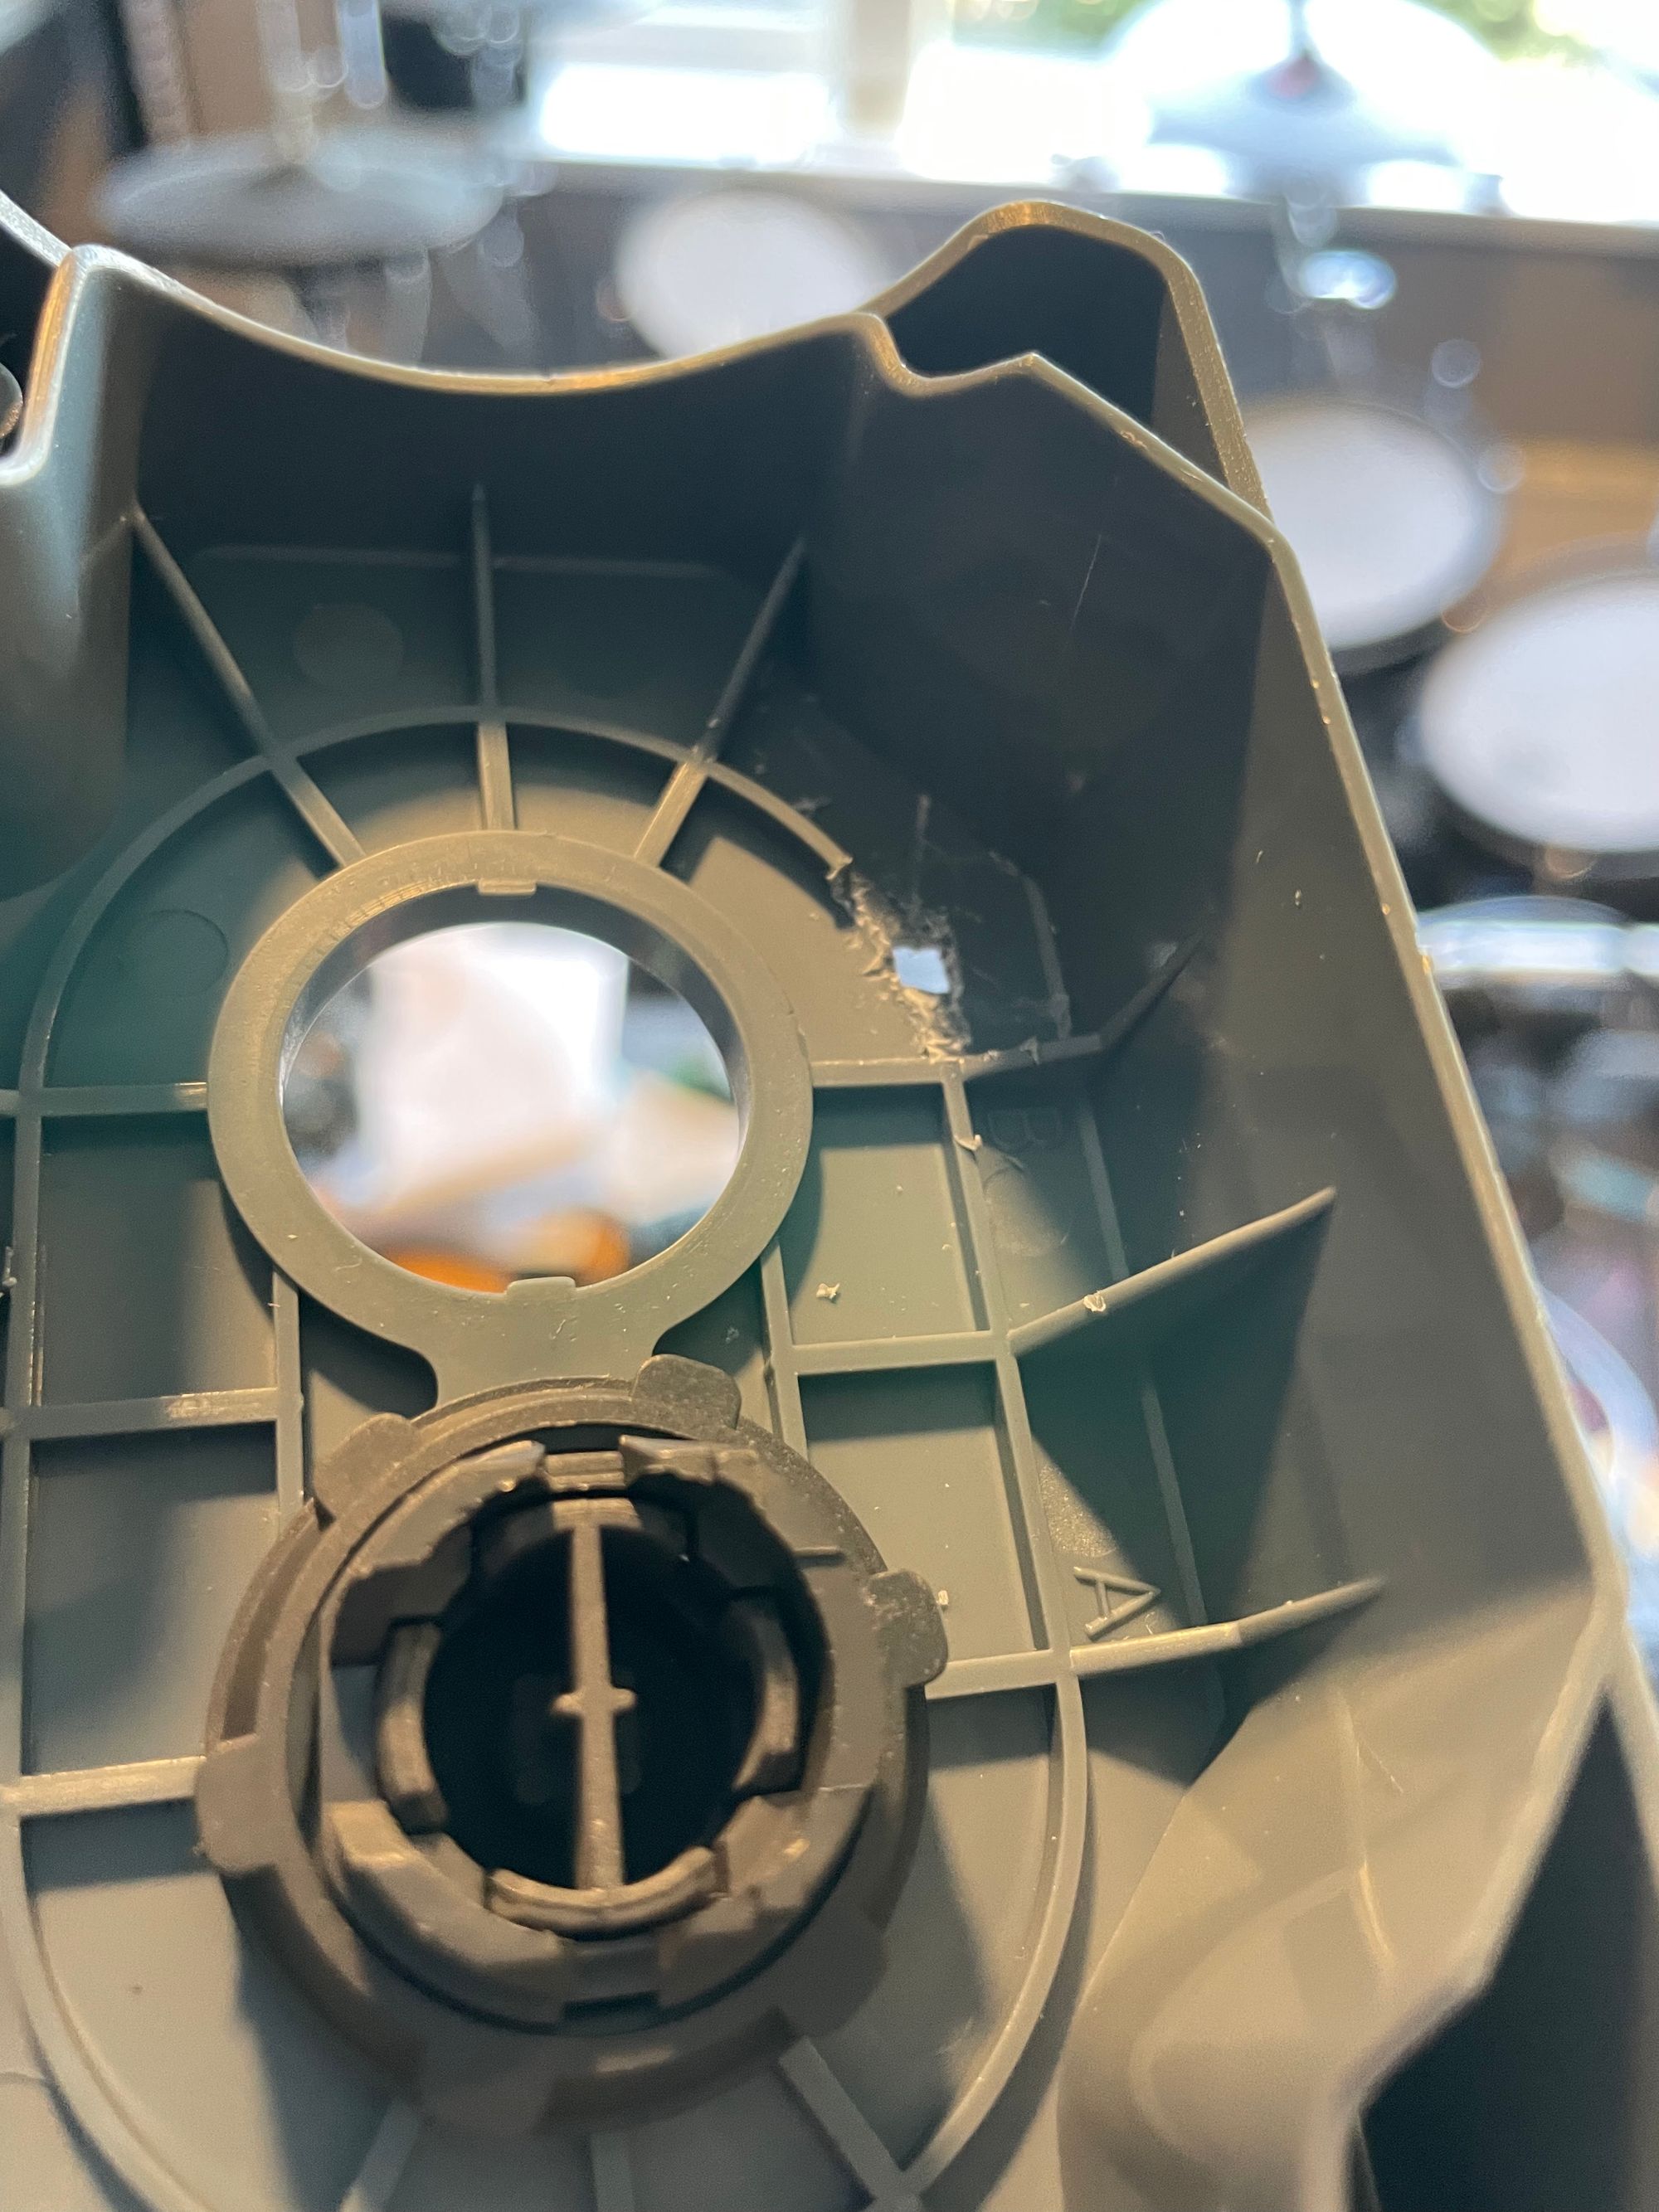
Hardware
The hardware part of this project is made up of a number of components.
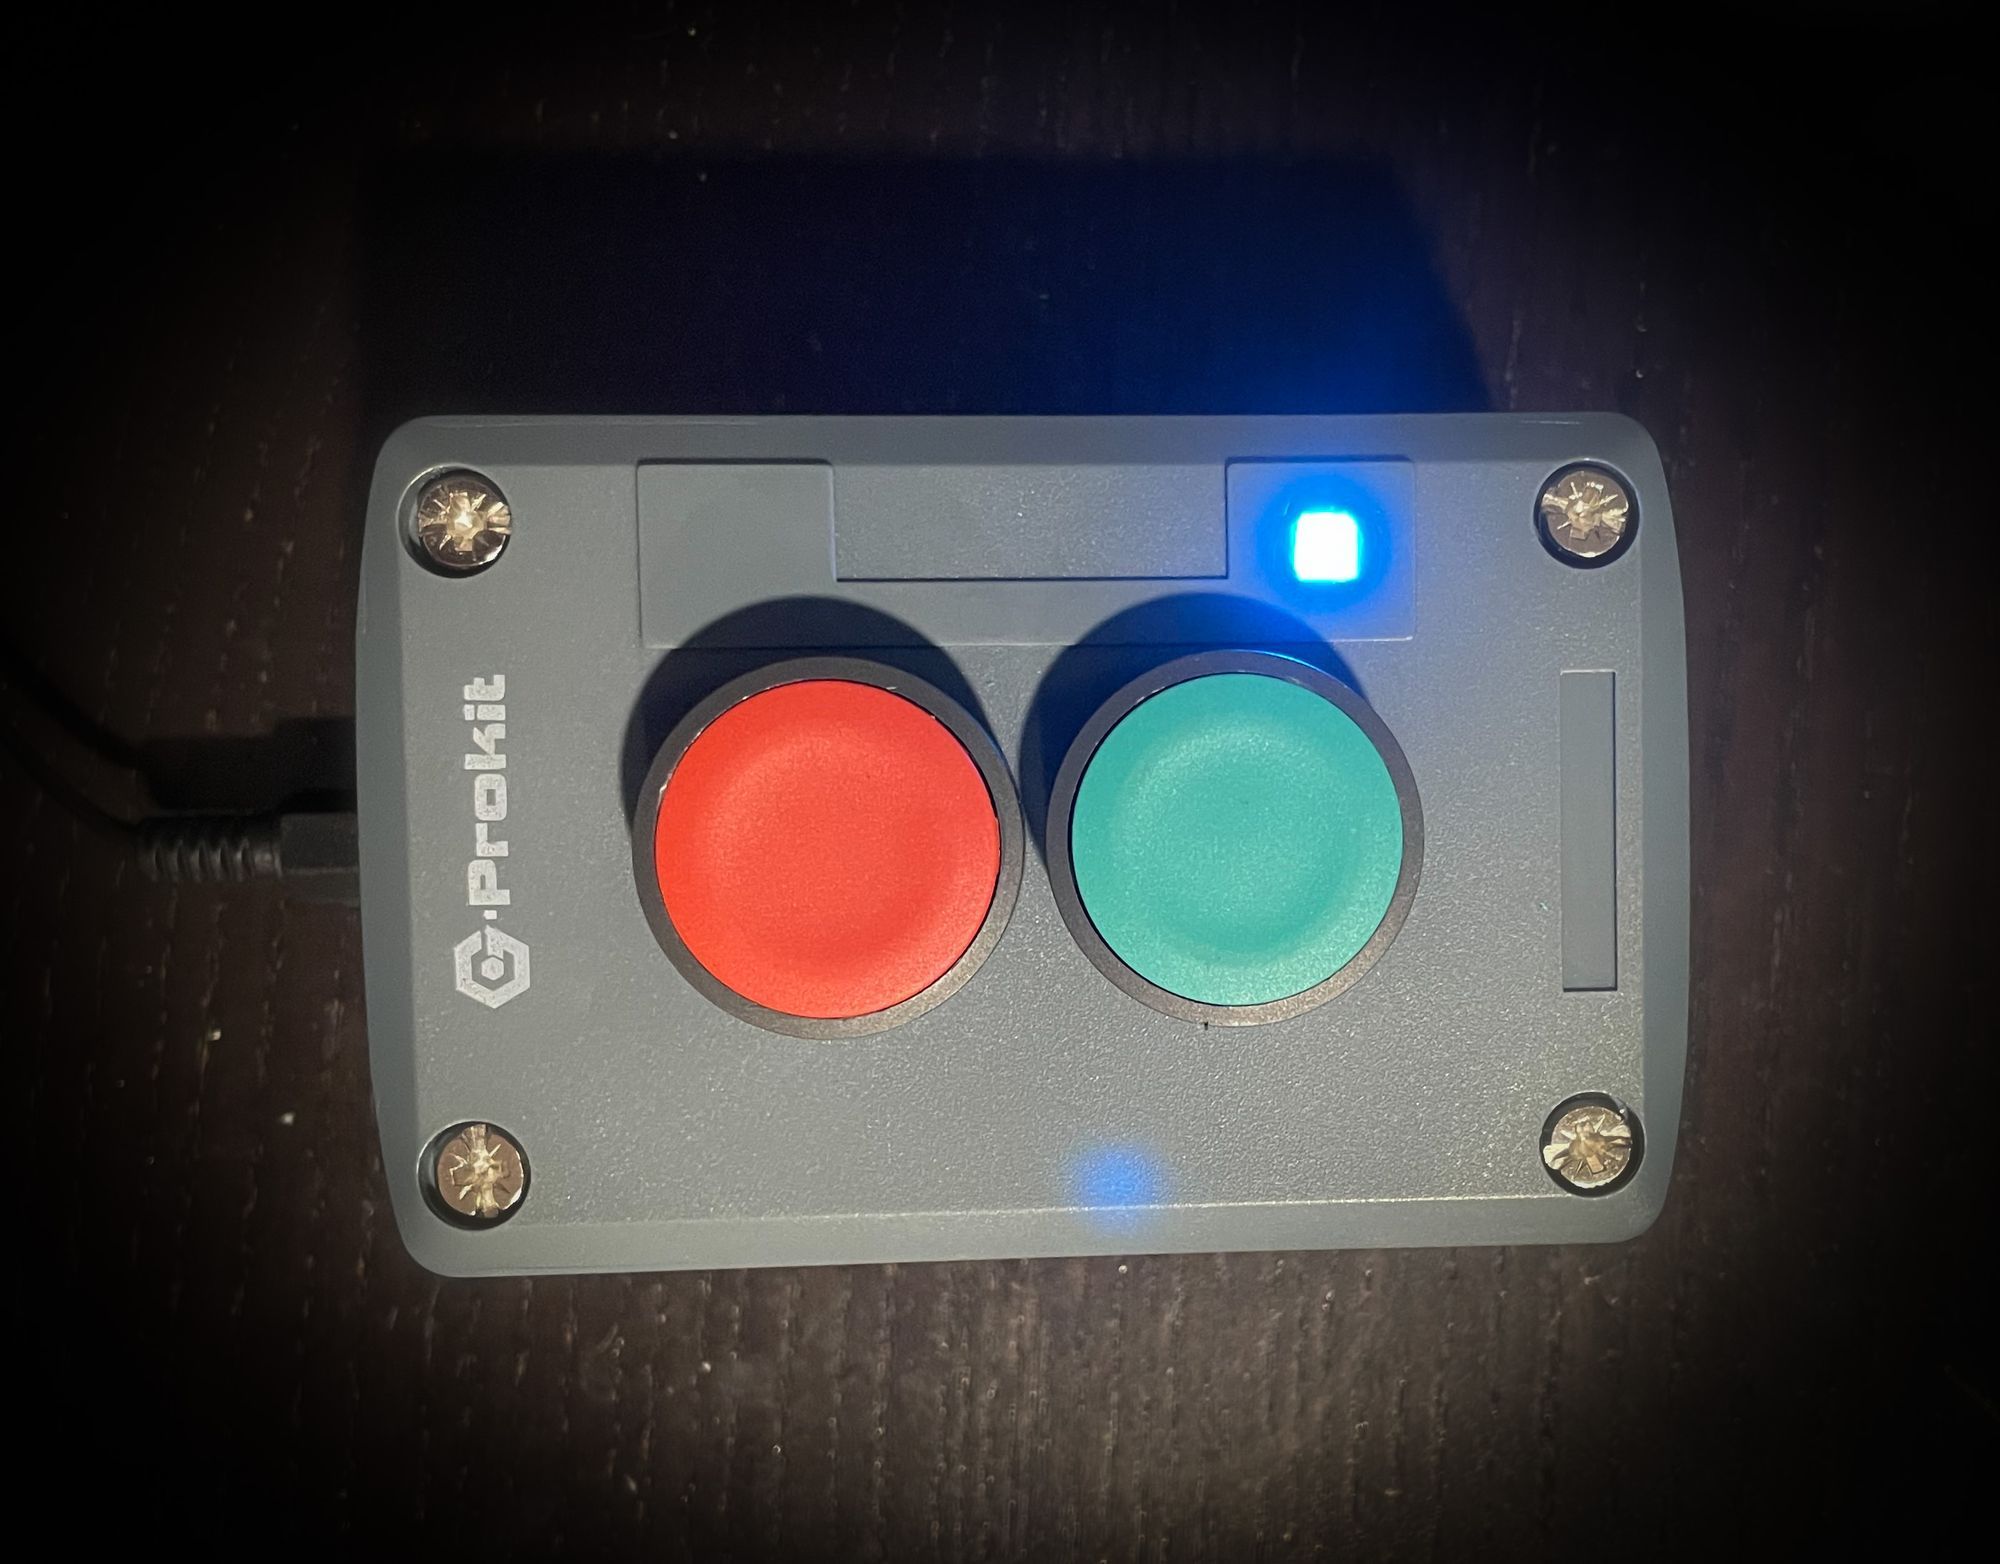
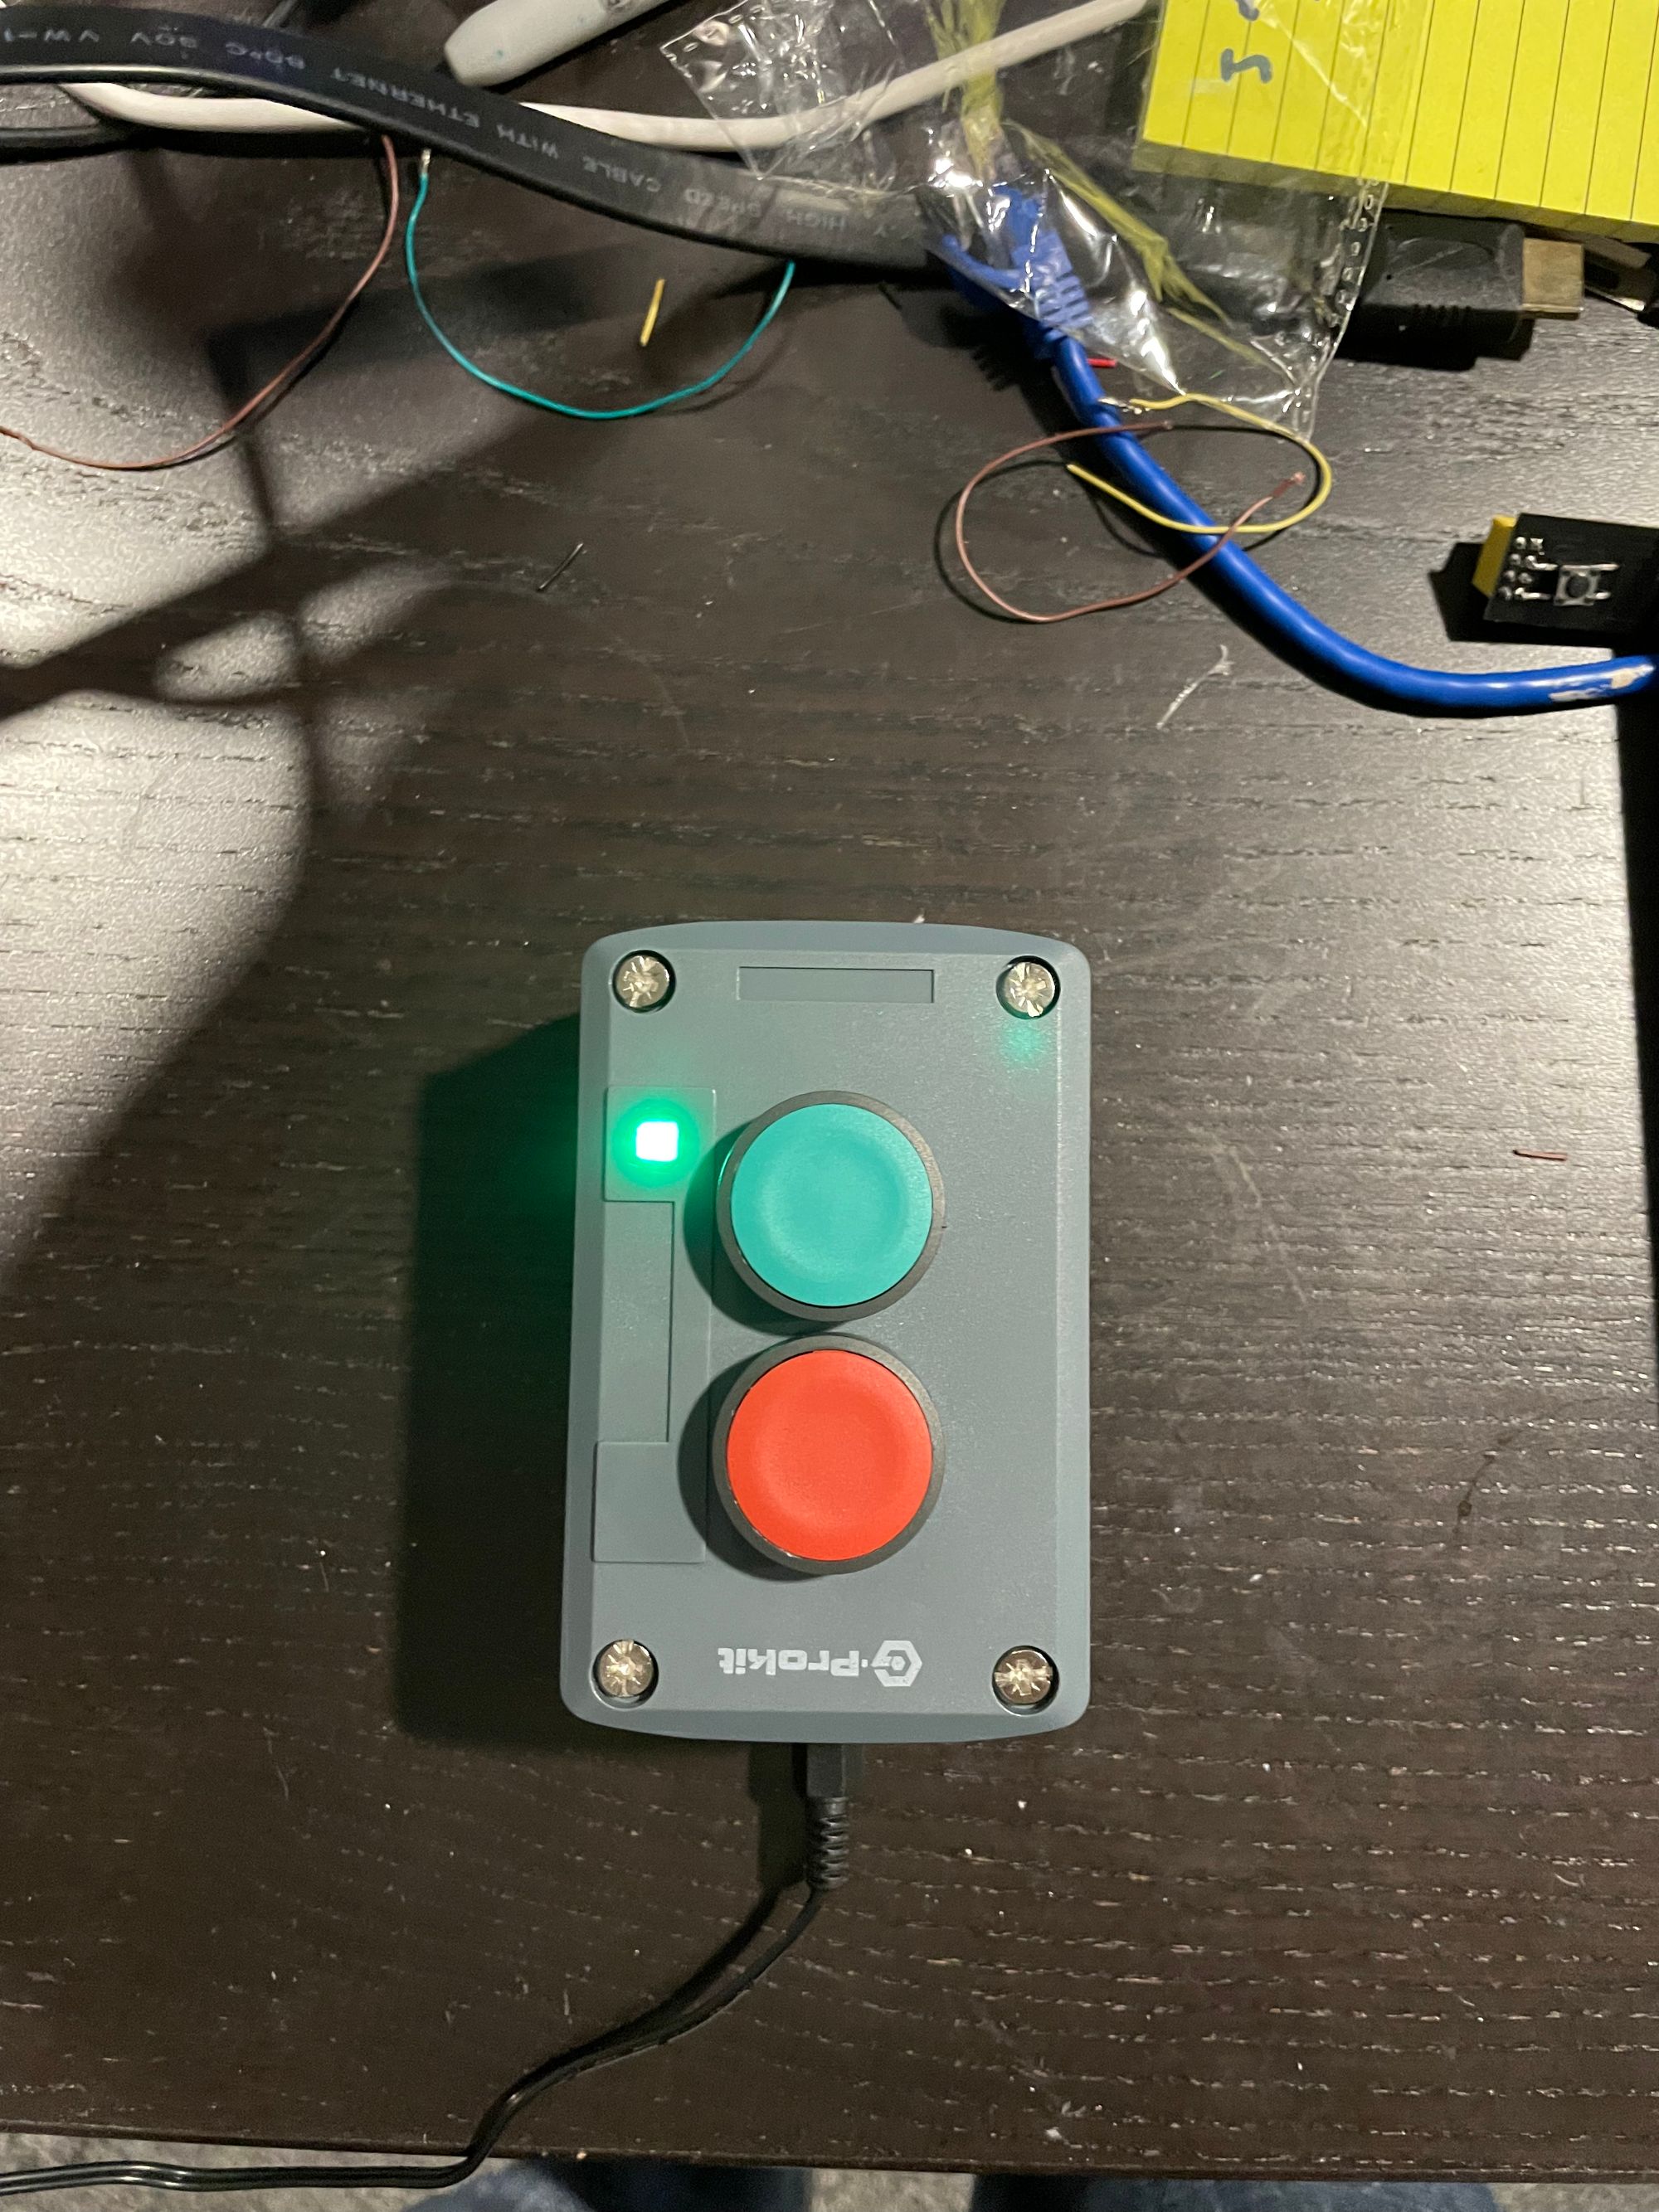
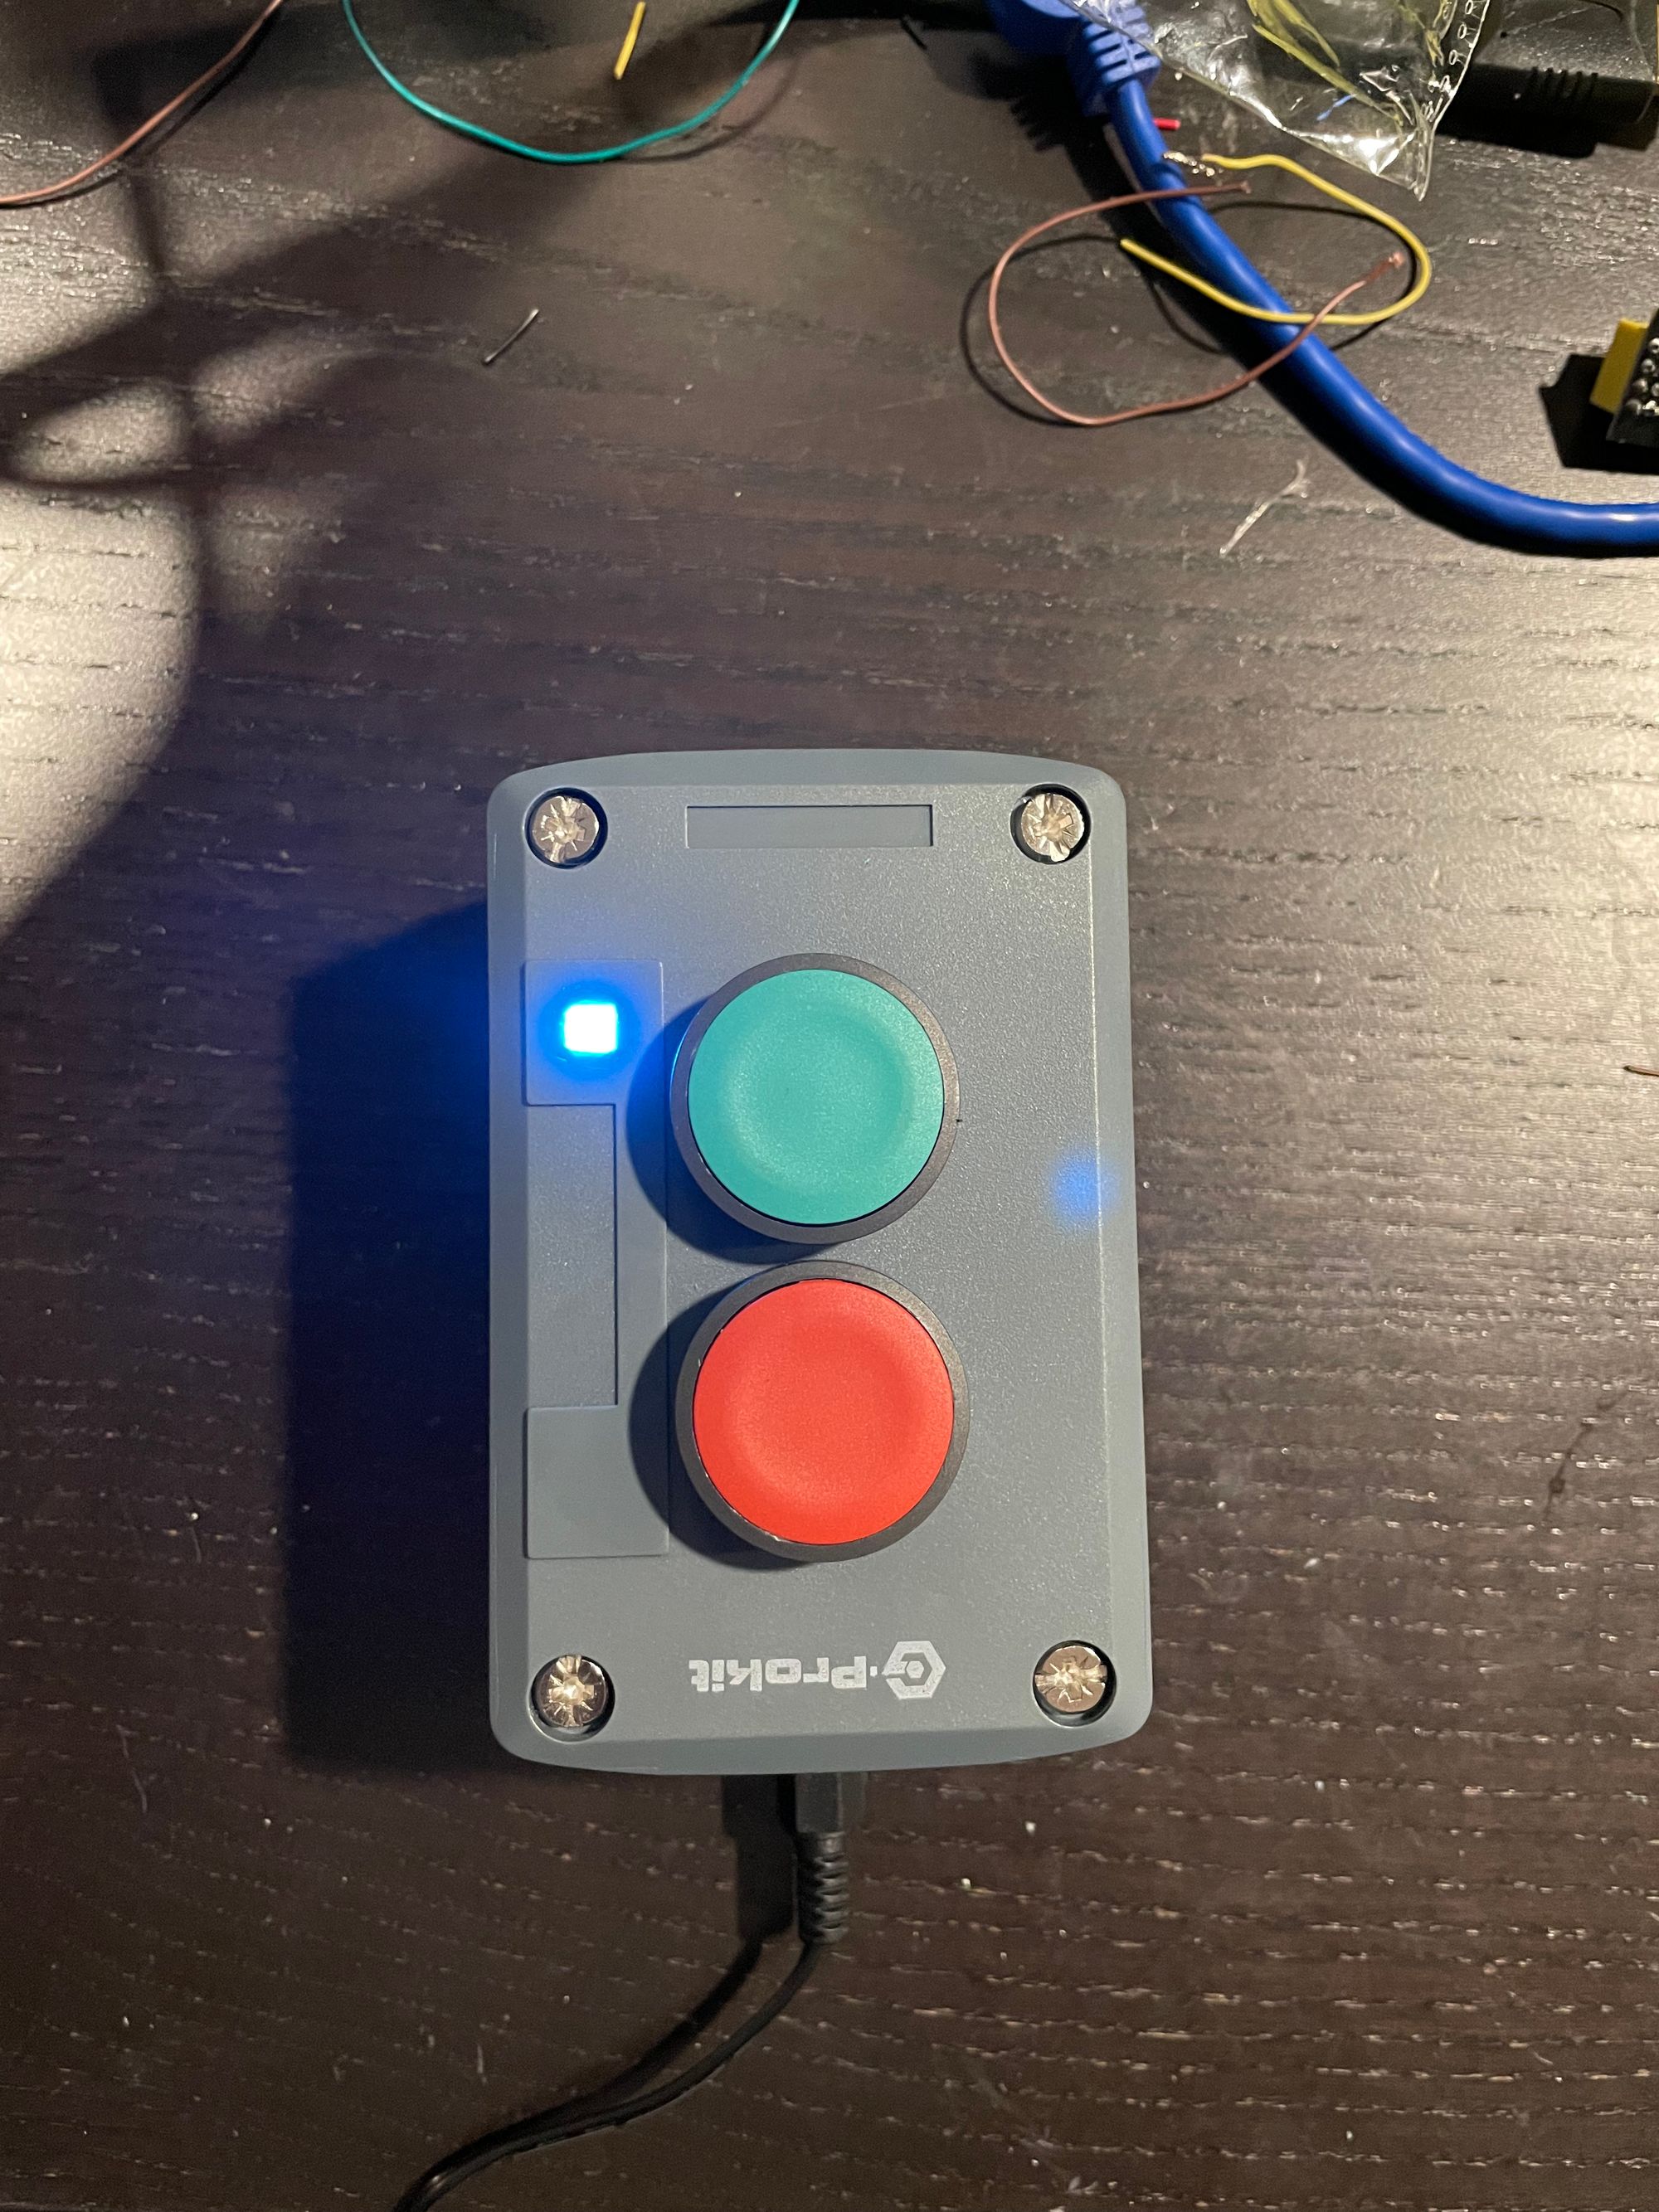
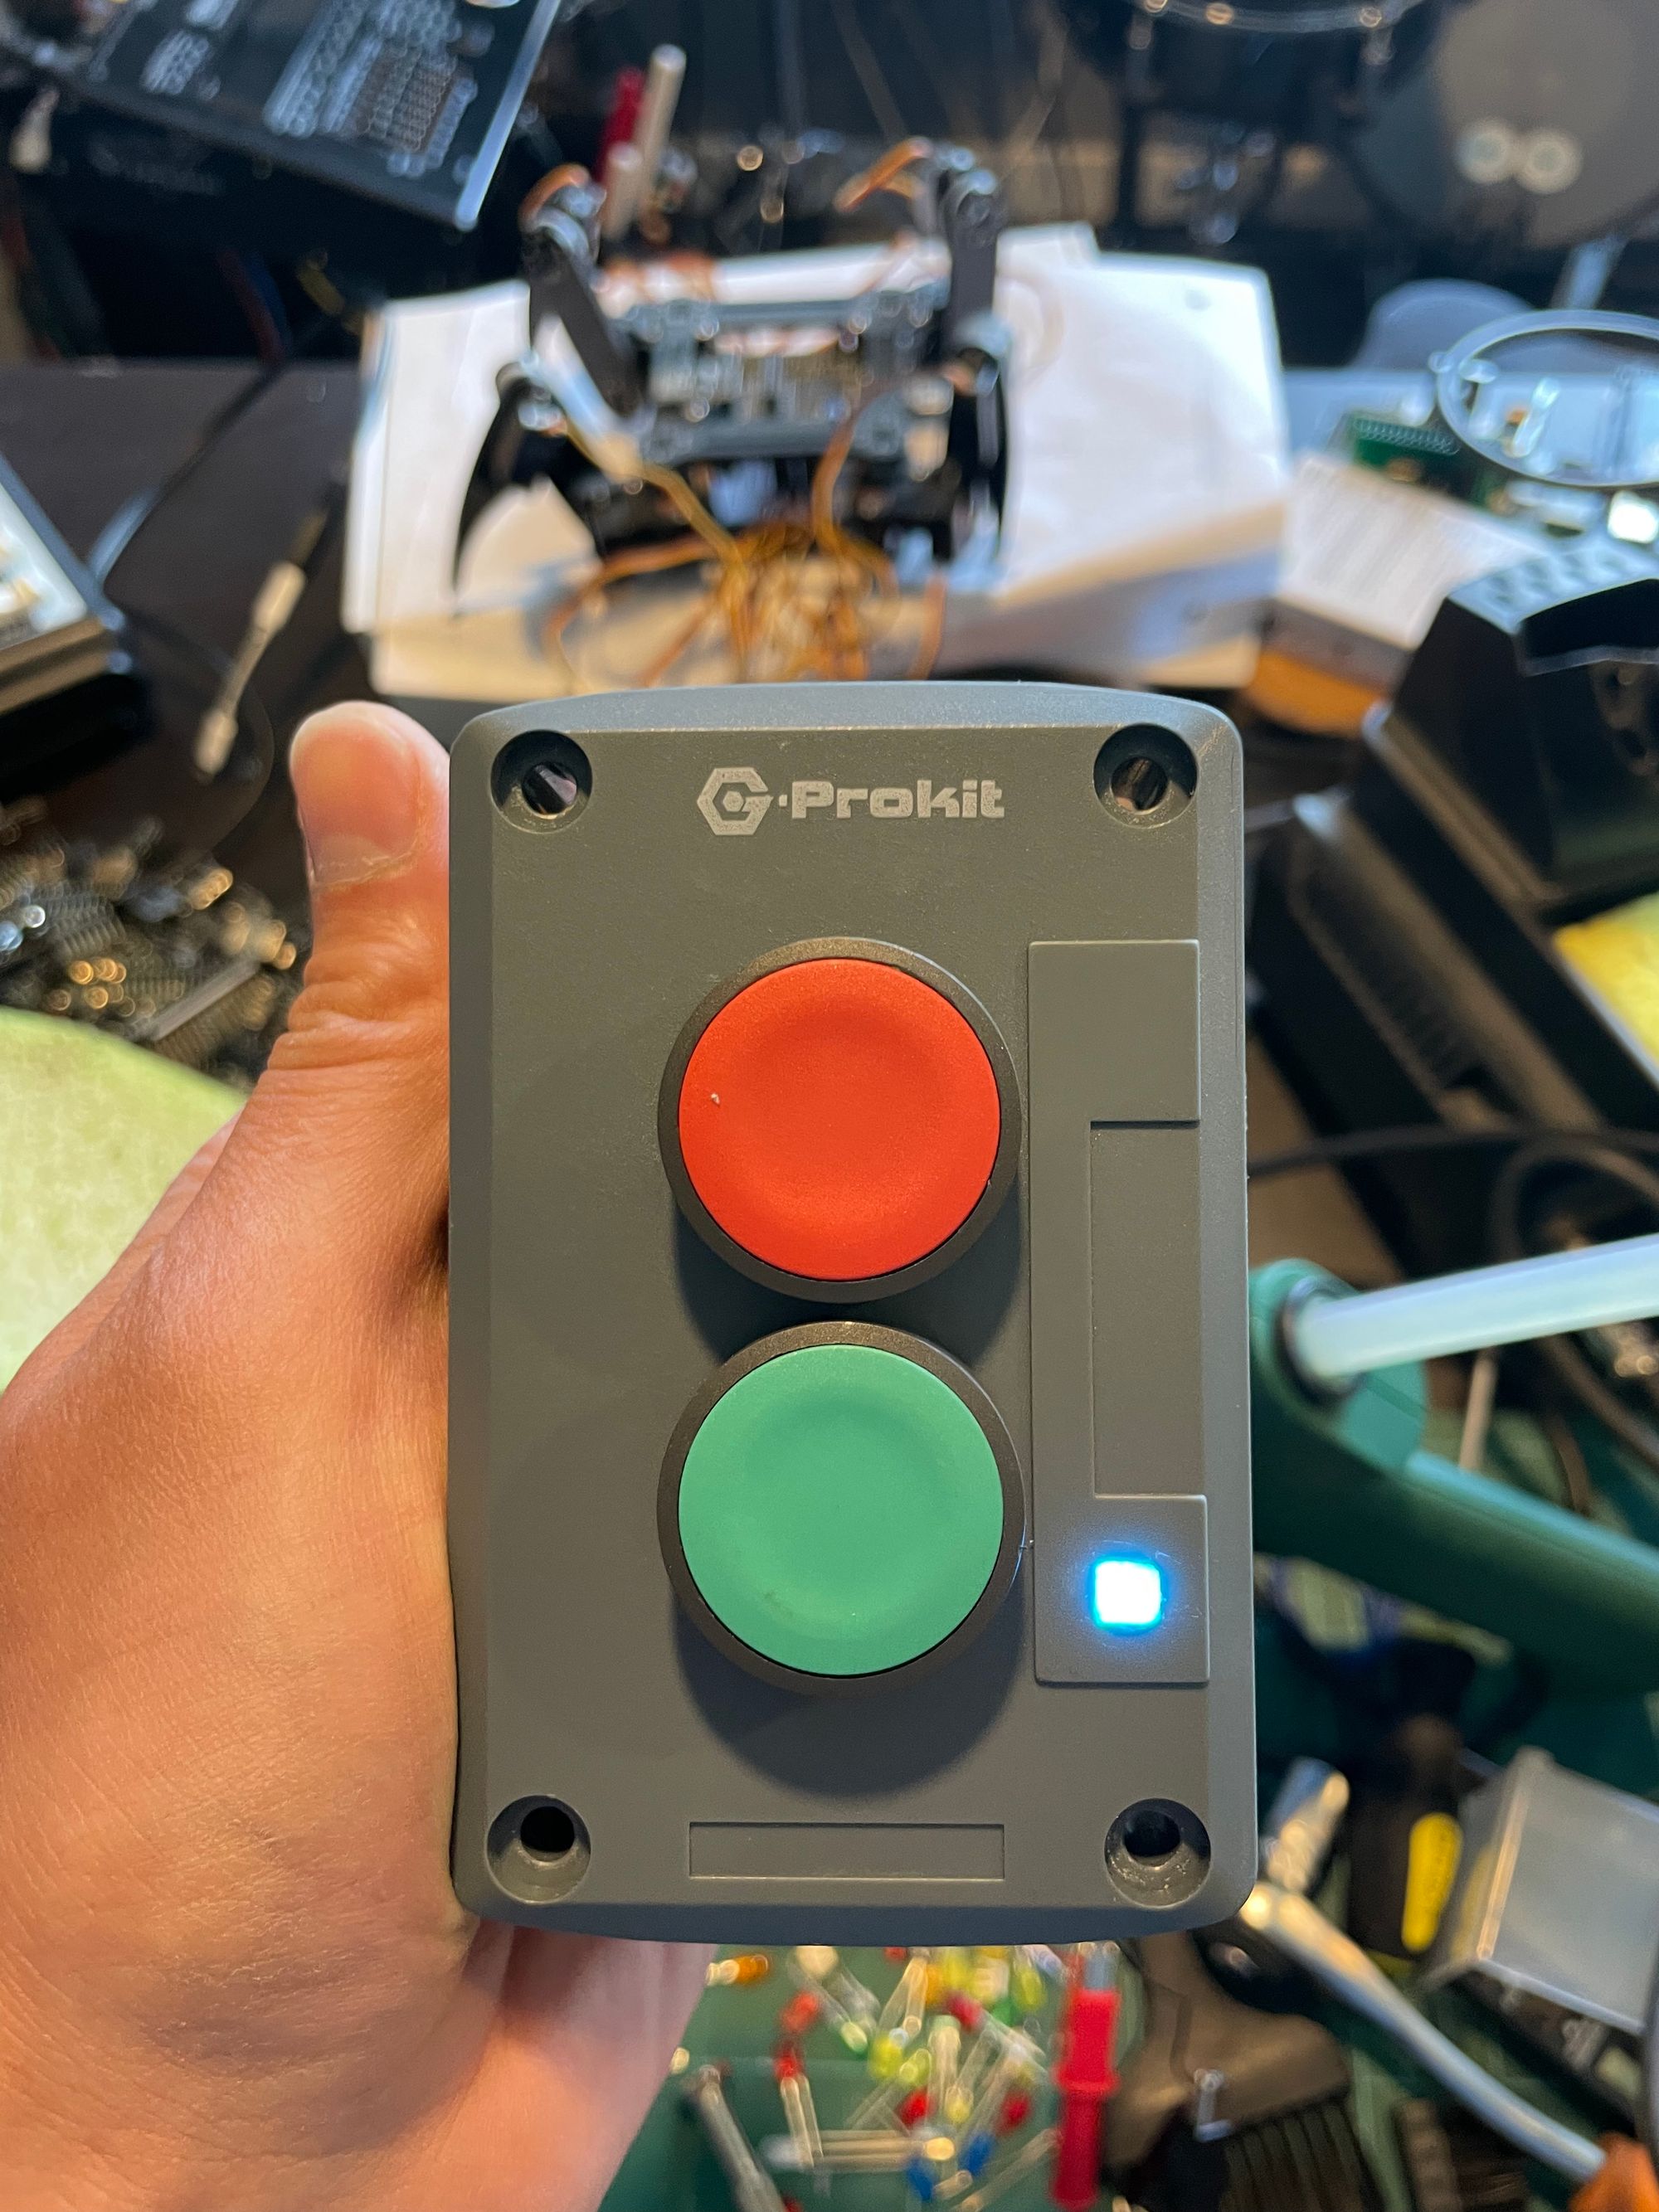
First is the enclosure, a G-Prokit IP65 2-way Red and Green Push Button Industrial Start/Stop Switch, Grey housing, door or gate release, Indoor or Outdoor use, waterproof (2-way Green/Red)
It's a simple, industrial waterproof enclosure. I don't plan to put it outside, so the IP rating is a trivial bonus, but the industrial nature of the buttons gives a nice robust tactile feel.
One note of caution is that often the red switches are Normally Closed (NC), whereas the green switches are normally open, which is "more normal". This means that the NC switches are connected by default, and break when pressed.
The two switch modules come with the box.
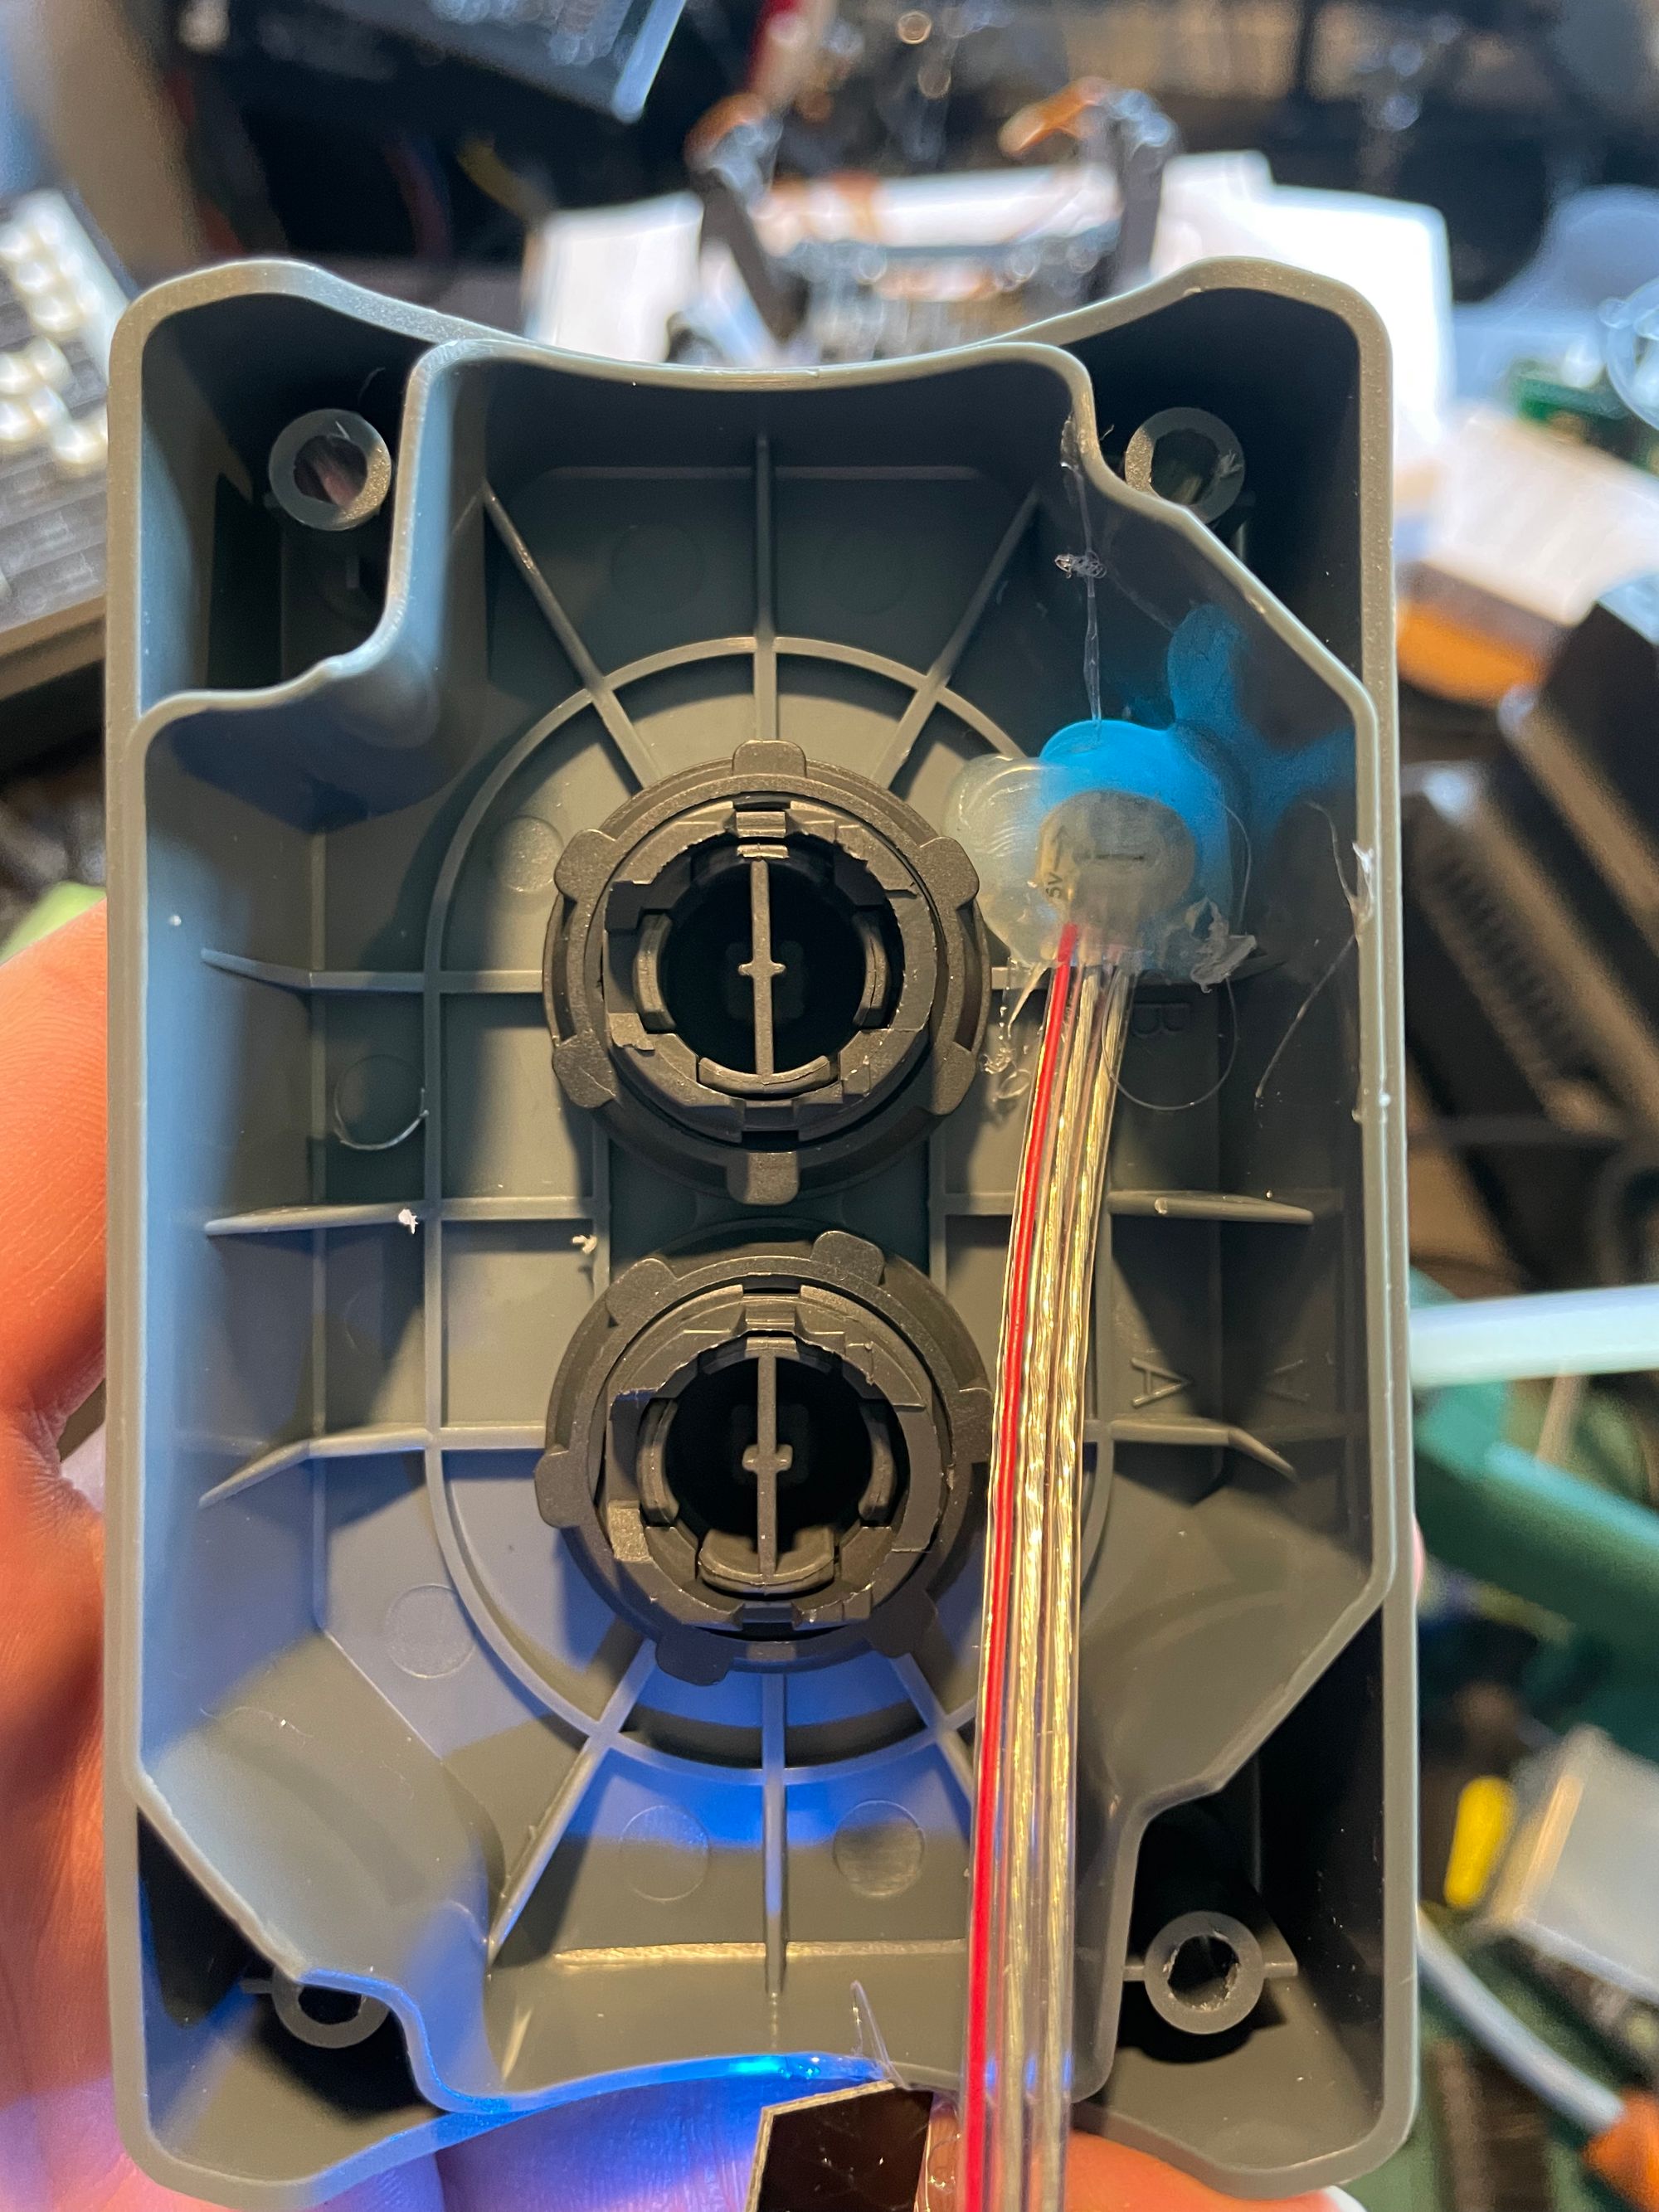
The indicator LED is one of a WS2812 string that comprises individual LEDs soldered to small PCBs and connected by wires like these and maybe similar to these.
The microcontroller is an ESP8266 ESP-01 as the I/O requirements are simple. These days I'd lean towards a ESP32C3 XAIO but this project pre-dates having those (Sept 2022, which shows how long the write ups can take to complete!)
The indicator area was cut out by hand and filled with hot glue to create a form of cloudy fibre-optic indicator (see the gallery below).
Gallery
Conclusion
The Wallbox Pulsar Plus is a great EV charger solution, especially for those who are not paranoid.
Fortunately, for those who are, the API is fairly open and integrations through Home Assistant and Apple's Homekit open up the options on top of what I've covered here.
Then for those of us who need to do it the hard way there's this approach.
We have multiple Wallbox chargers in use, including at our Holiday Let in Cumbria as they work well in both a domestic and commercial setting.